Top10VPN is editorially independent. We may earn commissions if you buy a VPN via our links.
How to Use a VPN on Apple TV
Overview
The easiest way to use a VPN on your Apple TV is to install a VPN application. Some VPNs that are available on the Apple TV App Store include ExpressVPN and Hide.me Free. If your Apple TV is not compatible with tvOS 17 or if your VPN doesn’t have a dedicated app, use AirPlay instead.

Since September 2023, Apple TVs have supported dedicated VPN apps. This is by far the best installation method as it’s easy to do and doesn’t require another device.
Quick Guide: Download a VPN App on Your Apple TV
- Subscribe to a VPN that offers a dedicated tvOS app, such as ExpressVPN or NordVPN.
- Open the App Store app.
- Search the name of your VPN service.
- Download and install the app.
- Log in using your account credentials.
- Connect to a VPN server.
However, the first three generations of Apple TV models don’t support VPN apps, and only 10 VPNs have released one. If your chosen VPN doesn’t offer a dedicated app or you have an older Apple TV, setting up a VPN is more challenging.
Here’s an overview of the various installation options available:
| Dedicated App | AirPlay | Smart DNS | Virtual Router | VPN Router | |
|---|---|---|---|---|---|
| Do We Recommend? | Yes | Yes | Yes | No | No |
| Set Up Difficulty | Very Easy | Very Easy | Easy | Medium | Hard |
| Works with Netflix | Yes | No | Yes | Yes | Yes |
| Streaming Apps | Many | Many | Few | Many | Many |
| Additional Costs | No | No | No | No | Yes |
| Hides Your IP Address | Yes | Yes | No | Yes | Yes |
Due to the complexity and additional hardware involved in setting up a virtual router or VPN router, we won’t cover those methods in this guide. After using an Apple TV 4K daily since the tvOS 17 update, we find there’s no good reason to go through the hassle.
Each of the three methods we detail will allow you to bypass geo-restrictions on Apple TV streaming apps, including Netflix, Max, and Disney+.
Method 1: Download a Dedicated tvOS App
Who should use this method:
Anyone with an Apple TV that is compatible with tvOS 17, which includes all models released after 2015.
How to Choose a VPN for Apple TV
The first step is to find a VPN that’s compatible with Apple TV and works with the streaming apps you want to access. Once you’ve done this, the rest of the setup is easy.
Here’s a full list of VPNs that offer a native app for Apple TV:
- ExpressVPN
- Hide.me Paid & Free
- Hola
- IPVanish
- NordVPN
- PrivadoVPN Paid & Free
- Private Internet Access
- PureVPN
- Surfshark
- X-VPN Paid & Free
You can compare the streaming performance of every VPN that offers a tvOS app in the table below:
Based on our experience using these VPNs on our Apple TV 4K, we recommend using ExpressVPN, IPVanish, or NordVPN. However, you can select any you want.
Here’s How to Set Up a Dedicated App on Apple TV:
- Make sure your Apple TV is running at least tvOS 17: Go to Settings > System > Software Updates and click Update Software if there is a new version available.
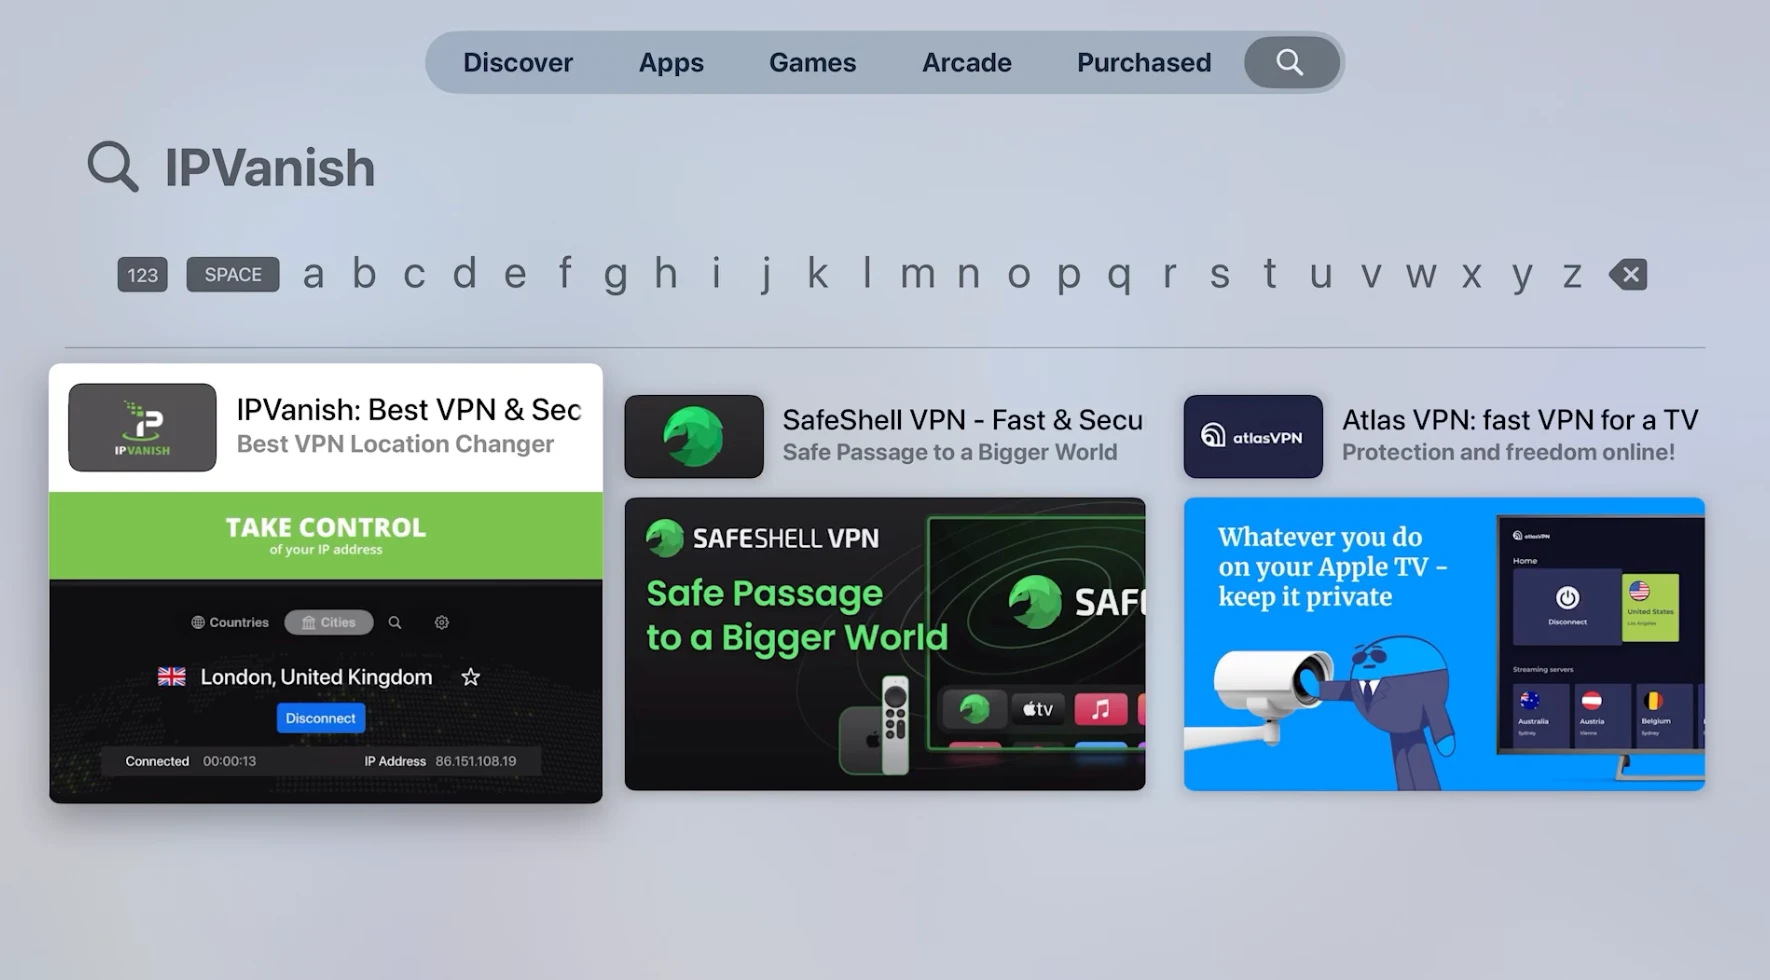
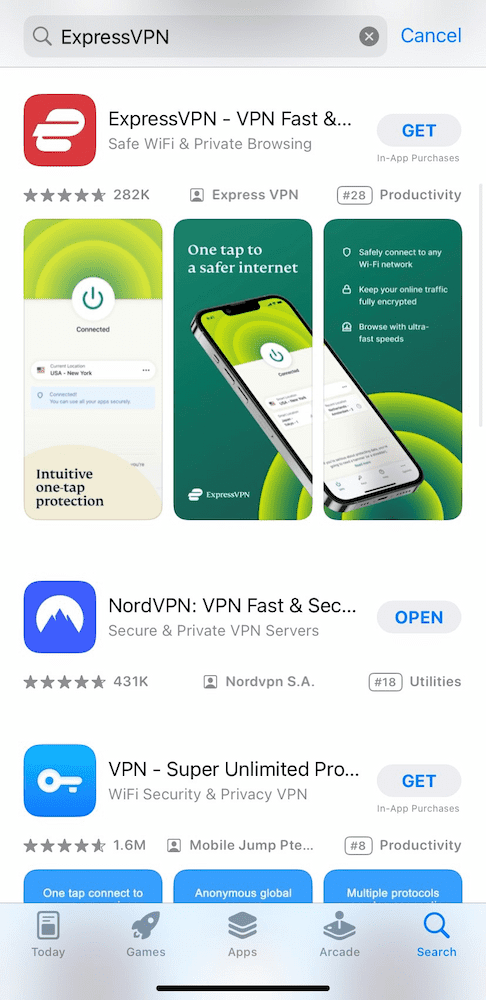
- Search for the name of the VPN app in the App Store: You can use the Siri search feature on your remote to make this quicker. We used IPVanish for this example.
- Install the VPN app: Choose the app from the search results, download it by clicking Get, and then open it once the download is complete.
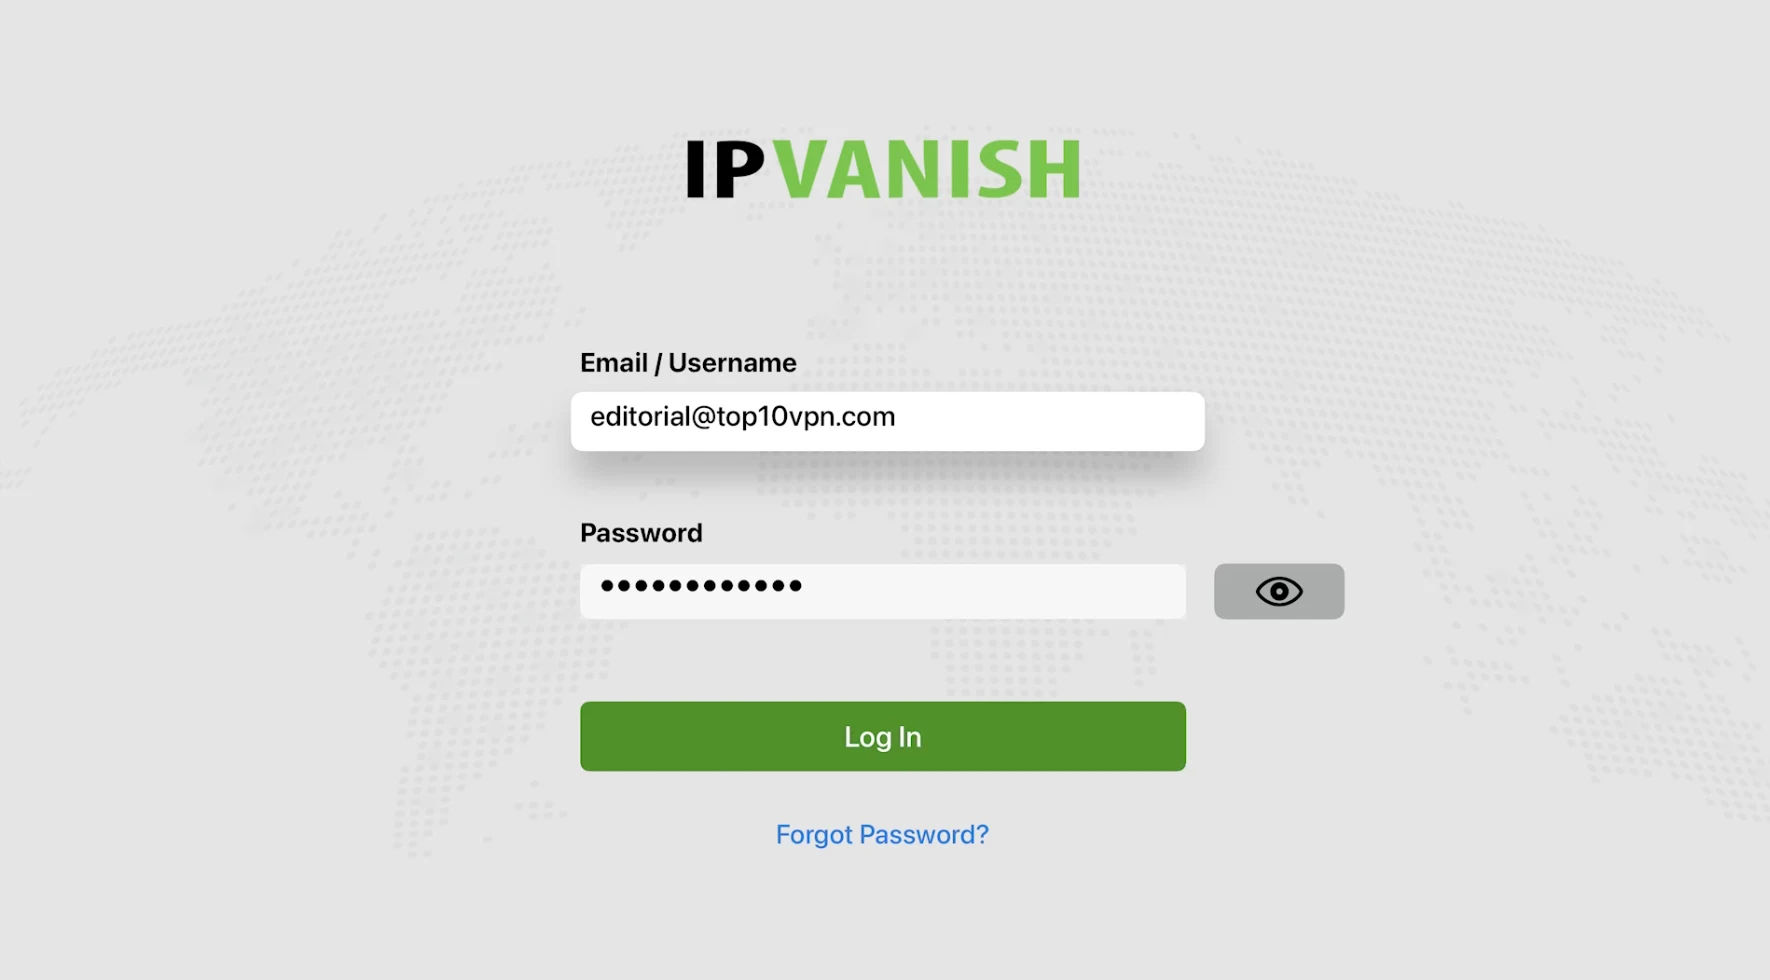
- Sign in using the account details you created earlier: Many apps allow you to quickly log in using a QR code. IPVanish requires you to manually enter your account details, but you can make this quicker by using the Apple TV Remote controls in Control Center on your iPhone.
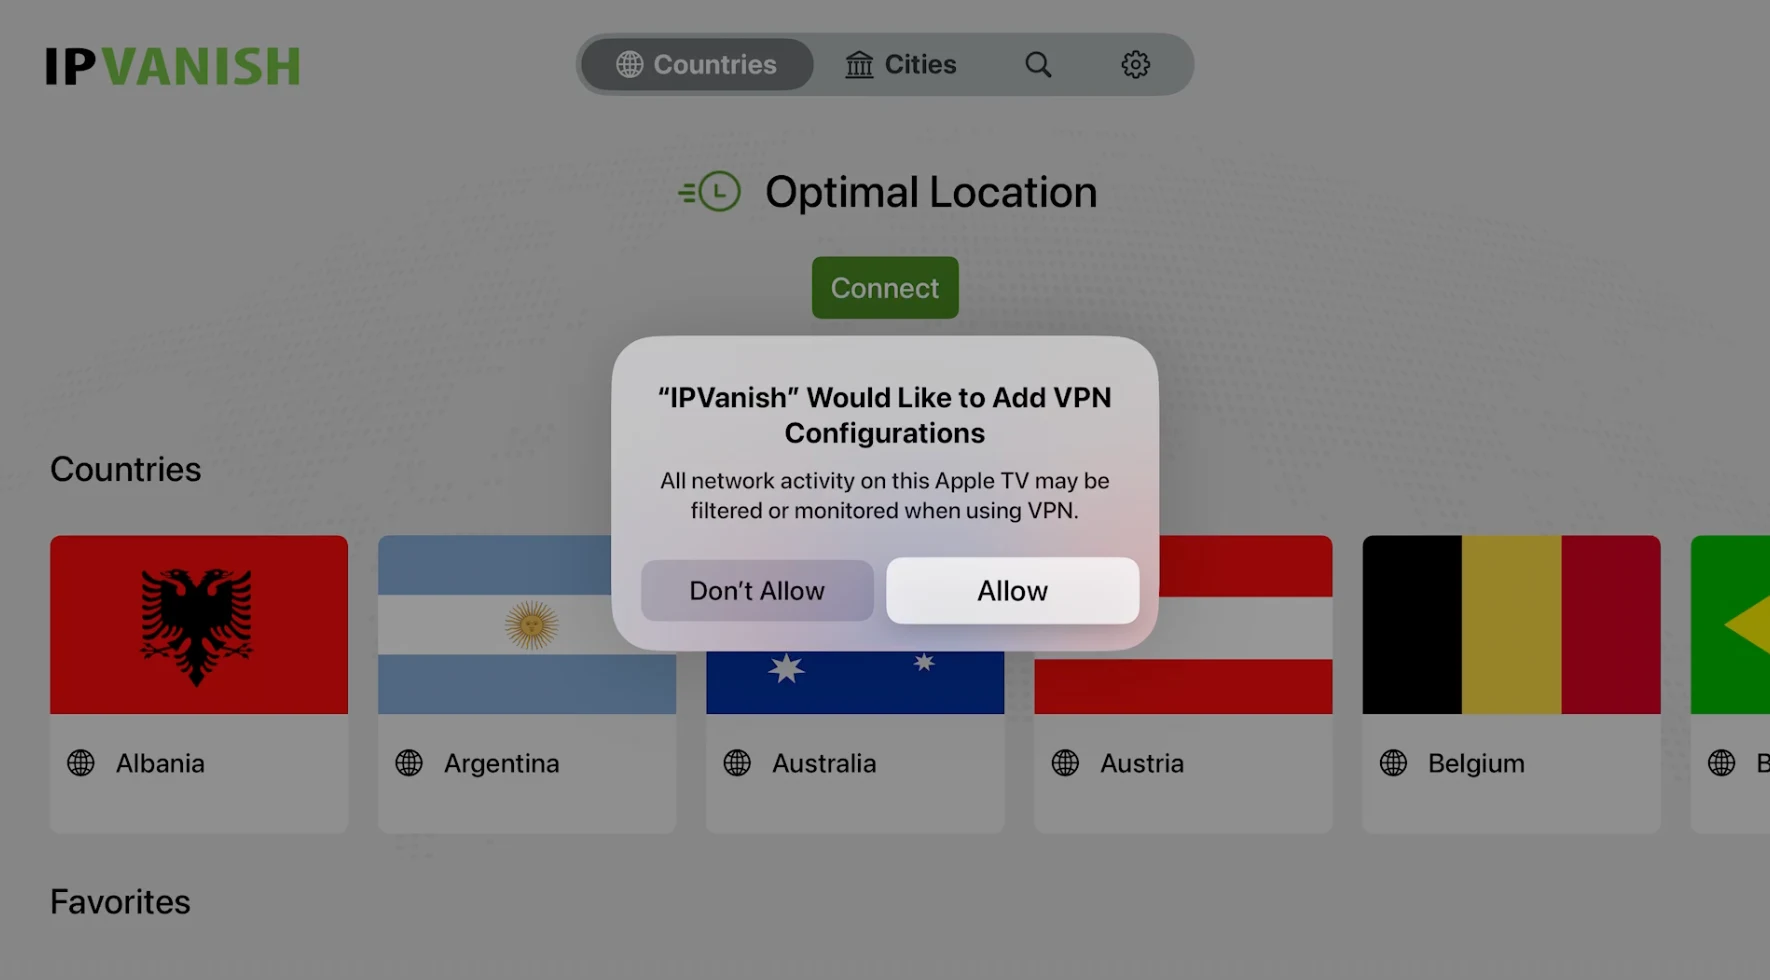
- Add VPN configurations: When prompted with ‘VPN Would Like to Add VPN Configurations’, select Allow.
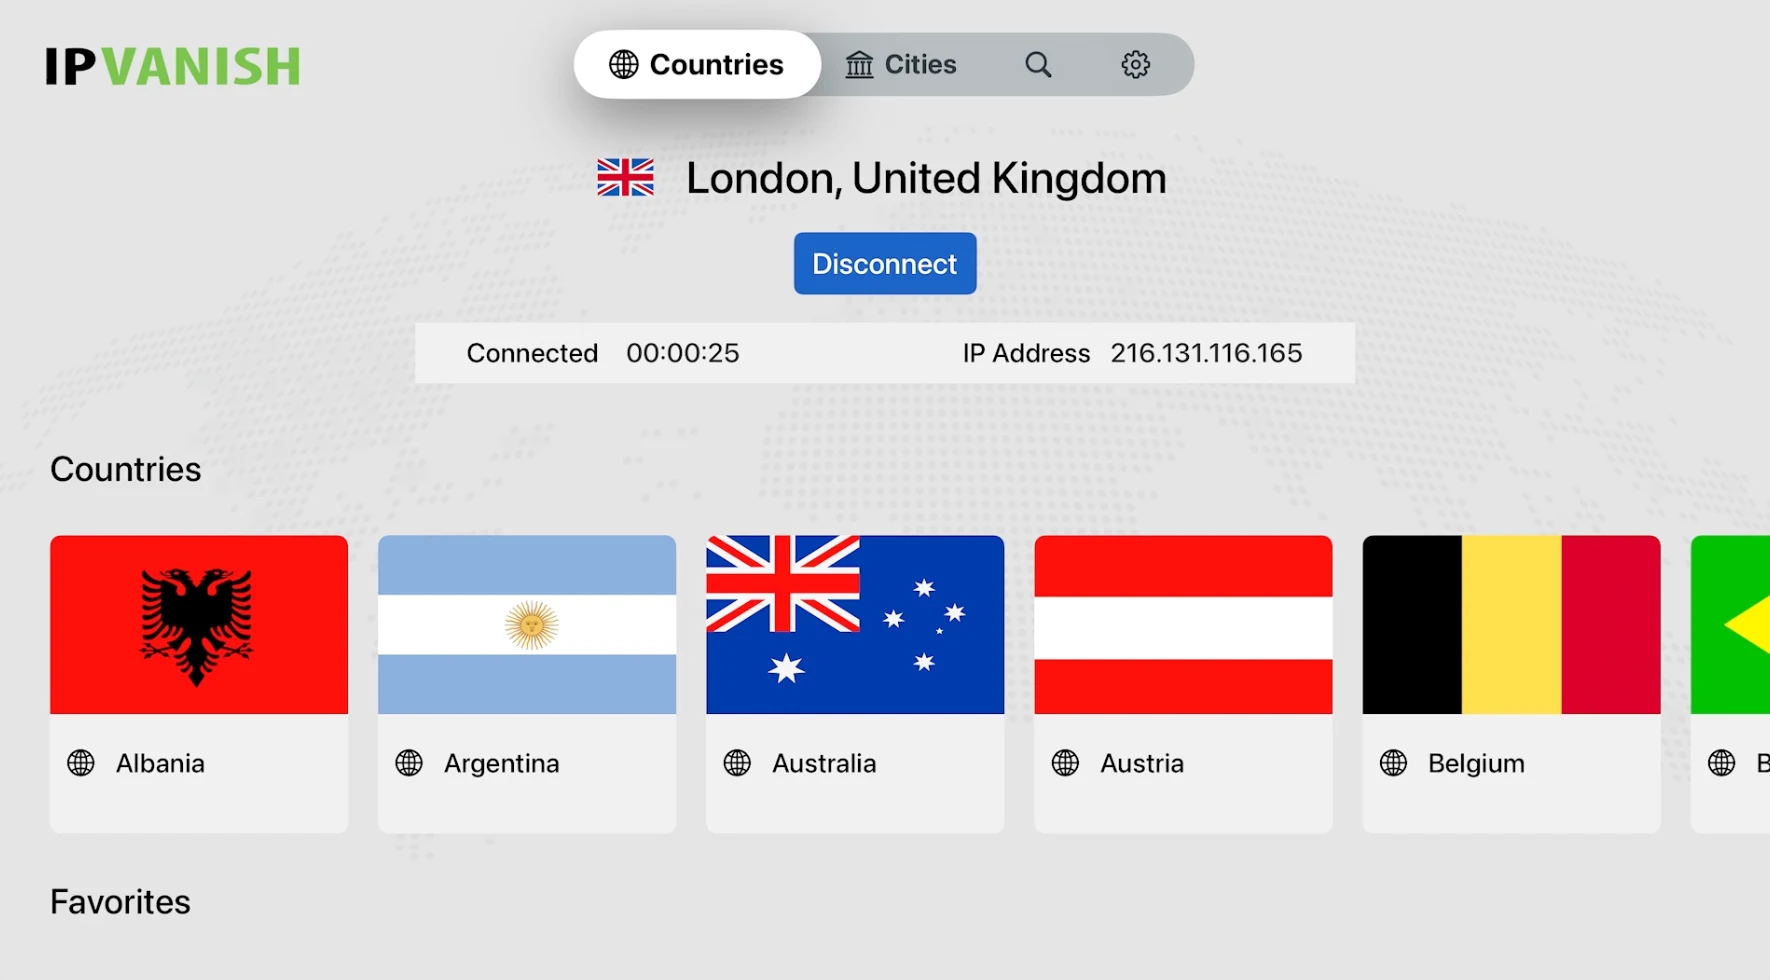
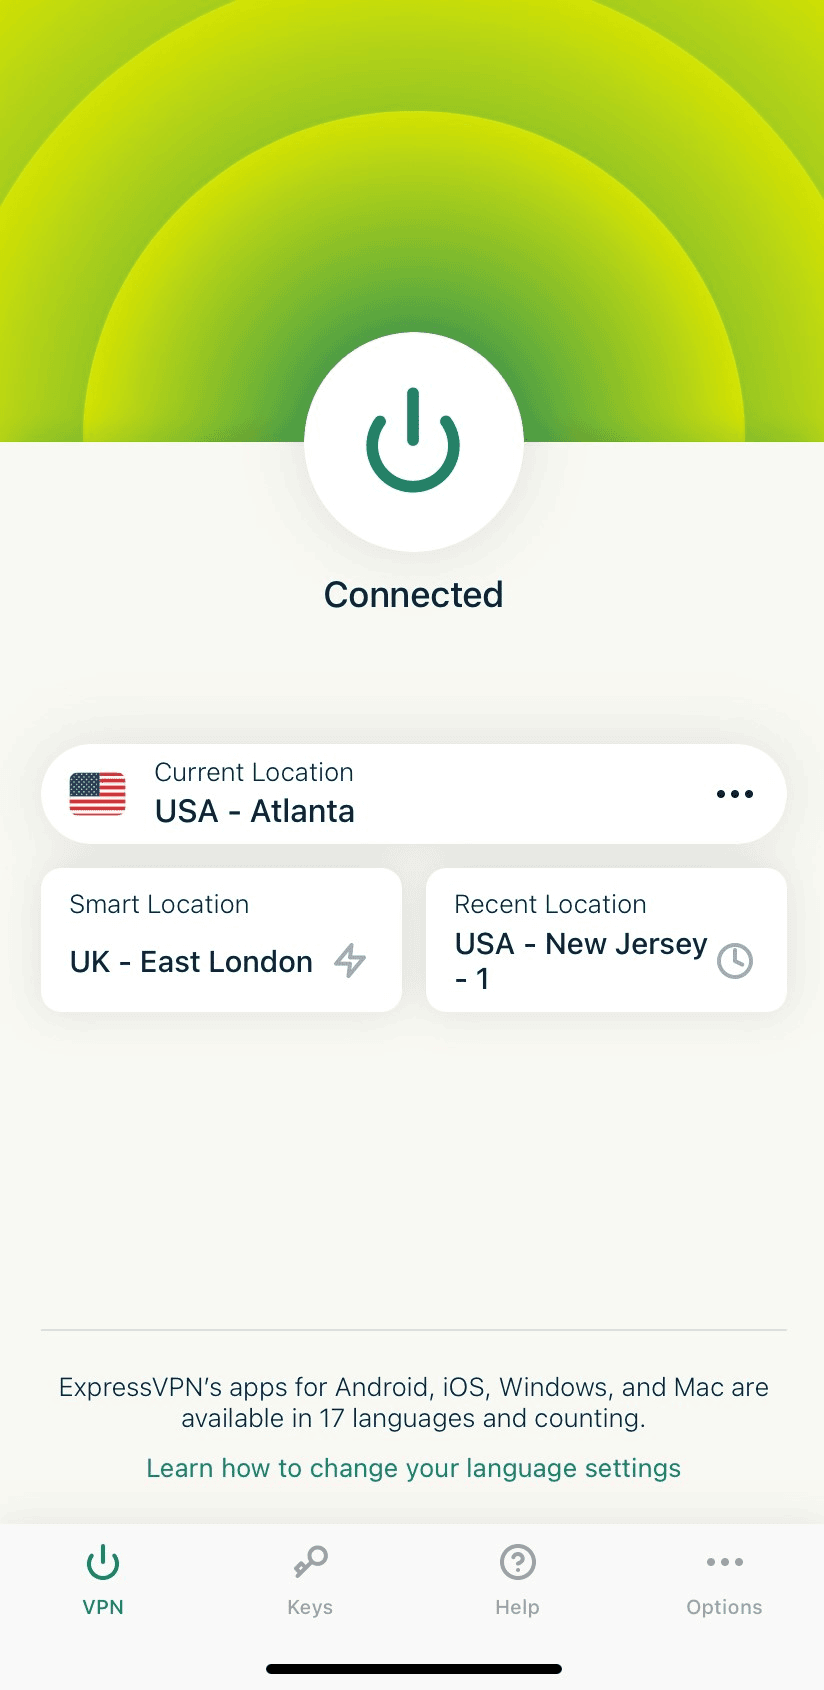
- Select the server location you want to get an IP address from: For example, to access UK Netflix, connect to a UK server.
- Open the streaming app with the content you want to watch: You can now access content that’s restricted to specific regions.


Method 2: AirPlay from an iOS Device
Who should use this method:
This method is ideal if your Apple TV doesn’t support tvOS 17 or if you’re unable to download apps on your Apple TV.
Here’s How to AirPlay from an iPhone or iPad to Apple TV:
- Verify that the streaming app supports AirPlay: Netflix doesn’t allow you to AirPlay its content. Disney+, Hulu, Max, and many other popular platforms are compatible.
- Ensure both your Apple TV and iOS device are connected to the same WiFi network.
- Verify that AirPlay is enabled on your Apple TV: Navigate to Settings > AirPlay and HomeKit > AirPlay must be set to On.
- Install a VPN app on your iPhone or iPad from the App Store.
- Connect to a VPN server on your iOS device: Select a location where your preferred streaming service is available. Only your iPhone or iPad will need to be connected to the VPN. Your Apple TV can remain on your regular connection.
- Activate AirPlay from the Control Center on your iPhone or iPad: Swipe down from the top right of the device and tap the AirPlay icon (a triangle with circles around it).
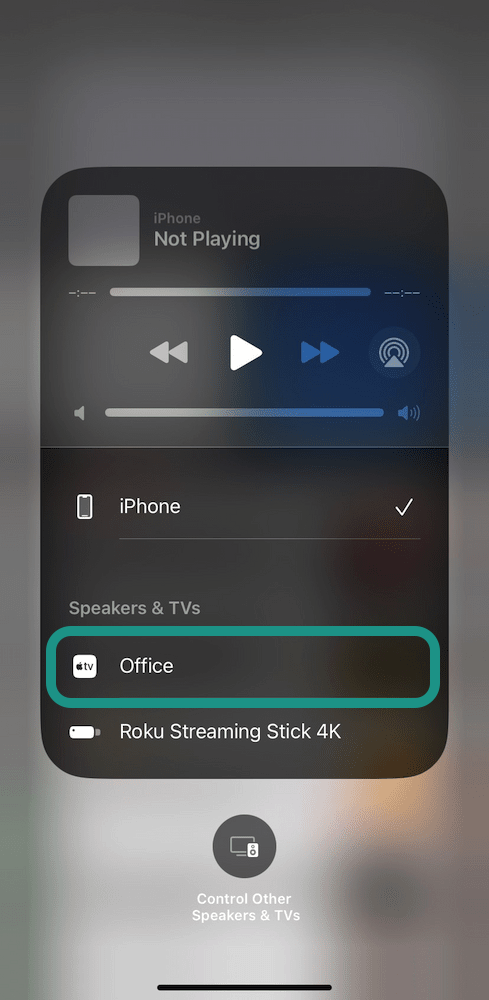
- Start streaming: Open the streaming service’s app on your iOS device and select the content you want to watch. Your selected content will automatically play on your Apple TV.
Method 3: Smart DNS
Who should use this method:
If you want to access Netflix or lack access to an iOS device. It’s also useful if your Apple TV doesn’t support tvOS 17 or if you’re unable to download apps on your Apple TV.
How to Set Up Smart DNS on Apple TV:
- Verify that your VPN service offers Smart DNS functionality: Popular VPNs that do include ExpressVPN, NordVPN, and Surfshark. IPVanish, Proton VPN, and PrivateVPN do not.
- Check the supported streaming apps: Unlike VPN apps, Smart DNS unblocks a specific list of services and routes your traffic automatically, without allowing you to choose the location. For example, ExpressVPN’s MediaStreamer can only access US Netflix, whereas the VPN can access 18 Netflix libraries.
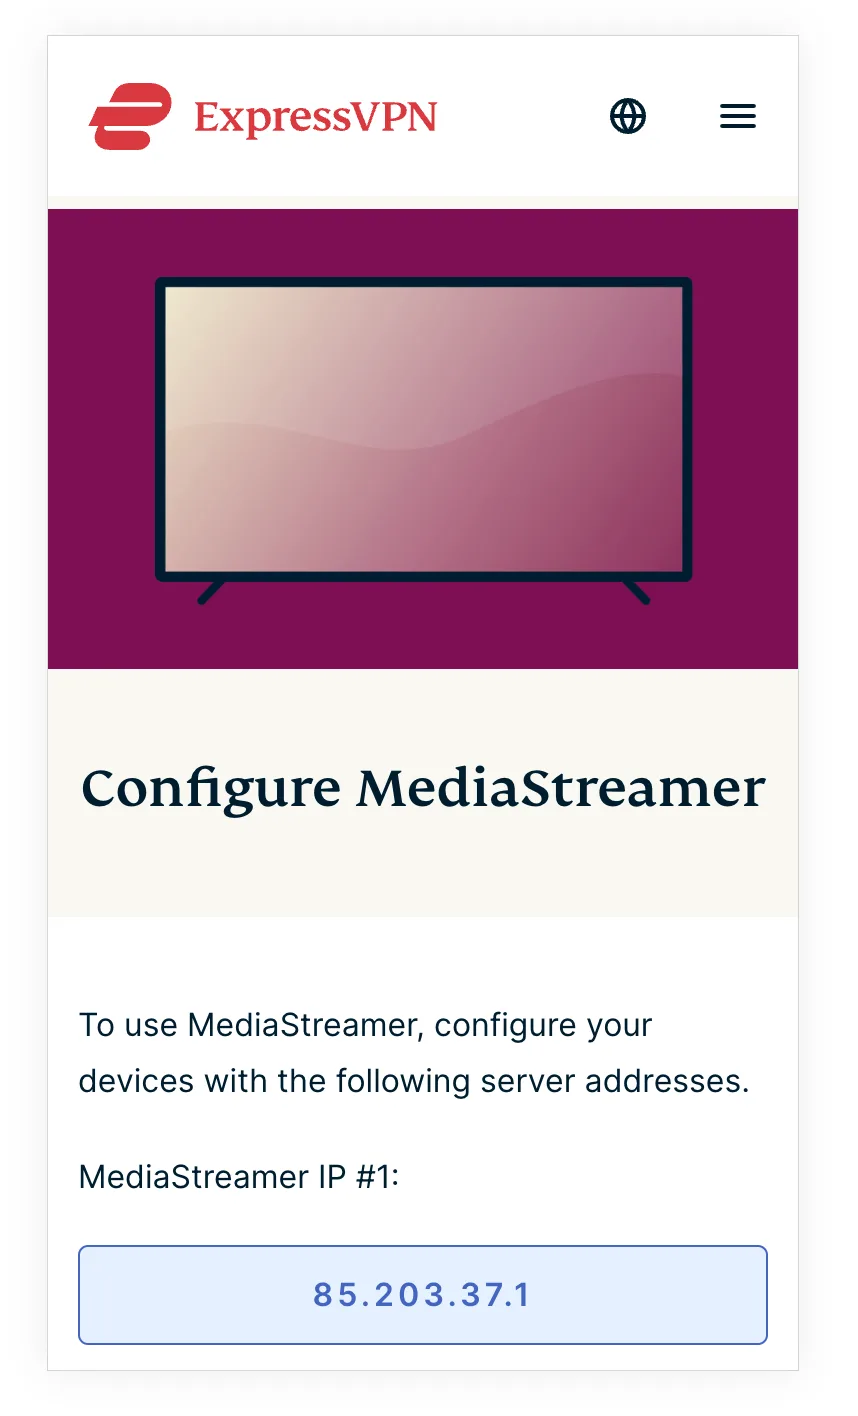
- On the VPN service’s website, provide your IP address: This is used to authenticate you as a subscriber. We used ExpressVPN for this example. You can do this by clicking ‘Register my IP address’ in the ‘DNS Settings’ sections of the account area.
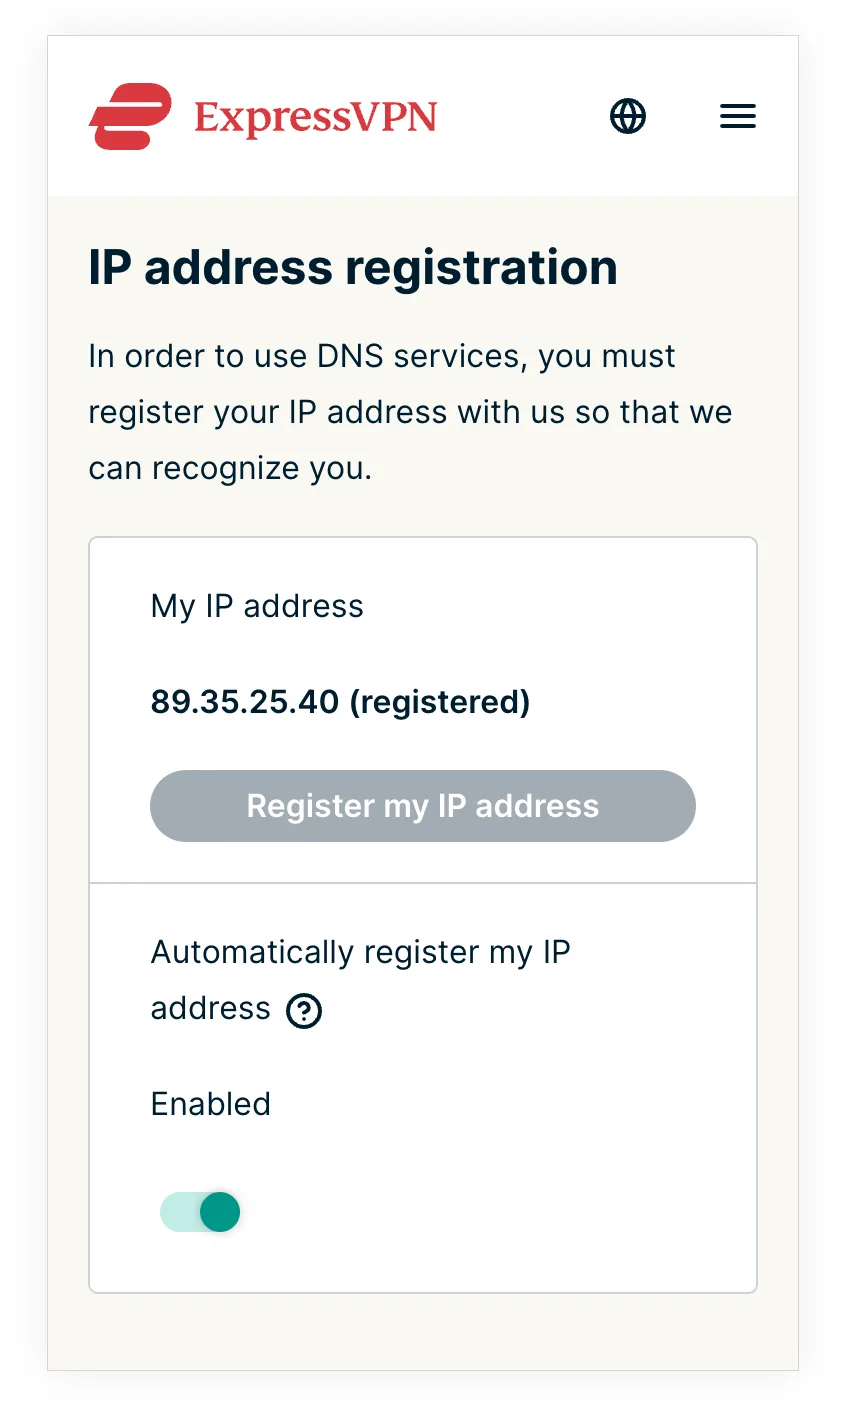
- Note down the Smart DNS server address: This will either be in the same page as you registered your IP address or on a separate setup page, as it is with ExpressVPN. We recommend taking a picture or screenshot of this code so you don’t forget it.
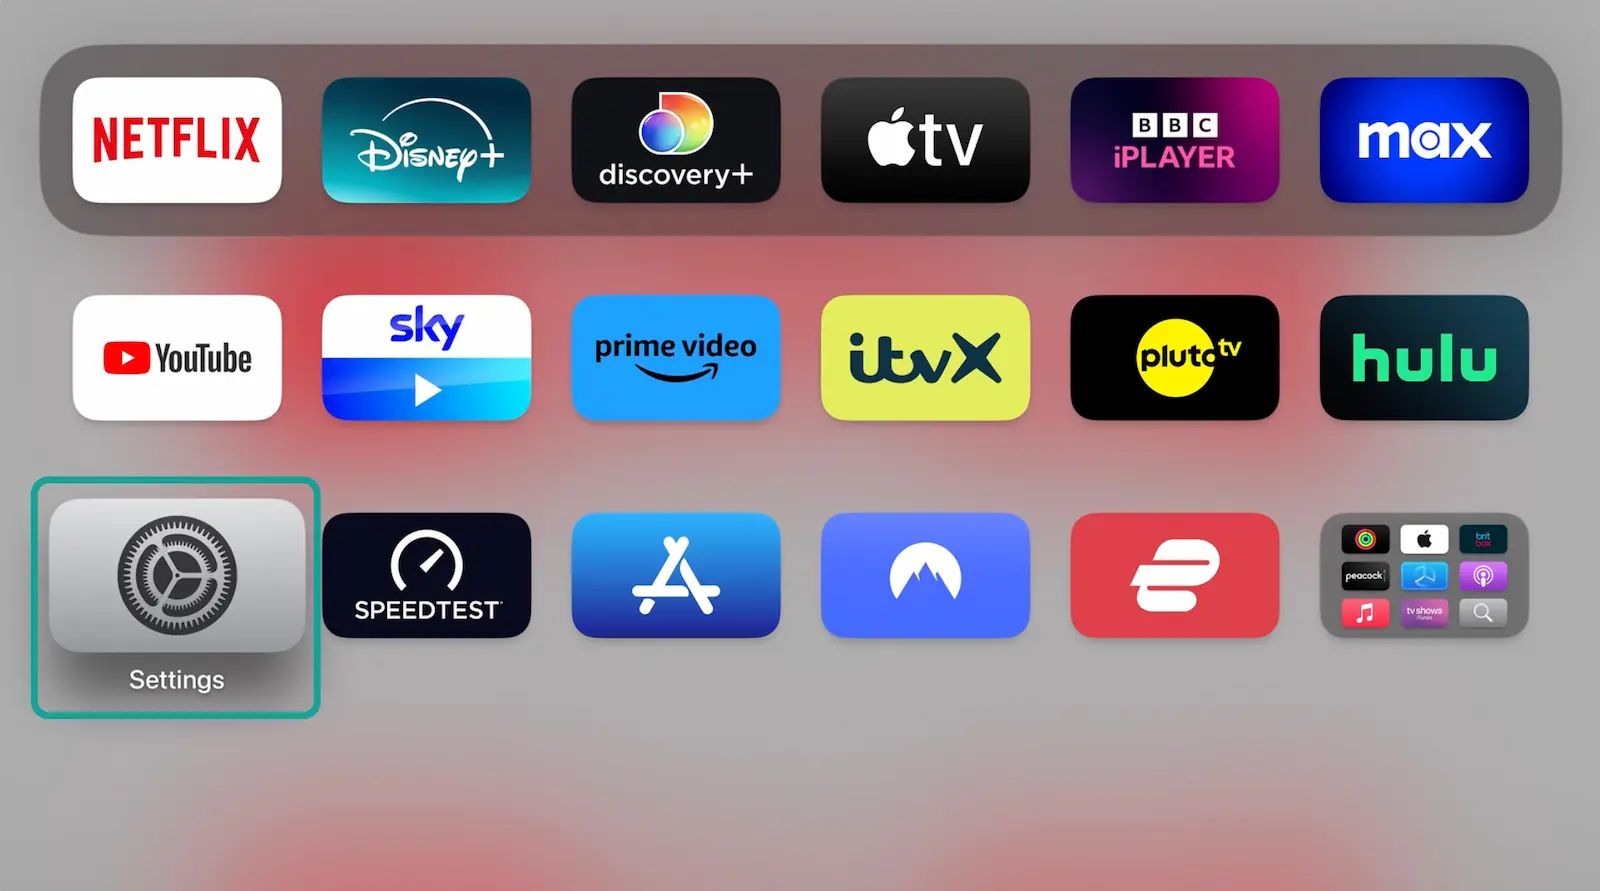
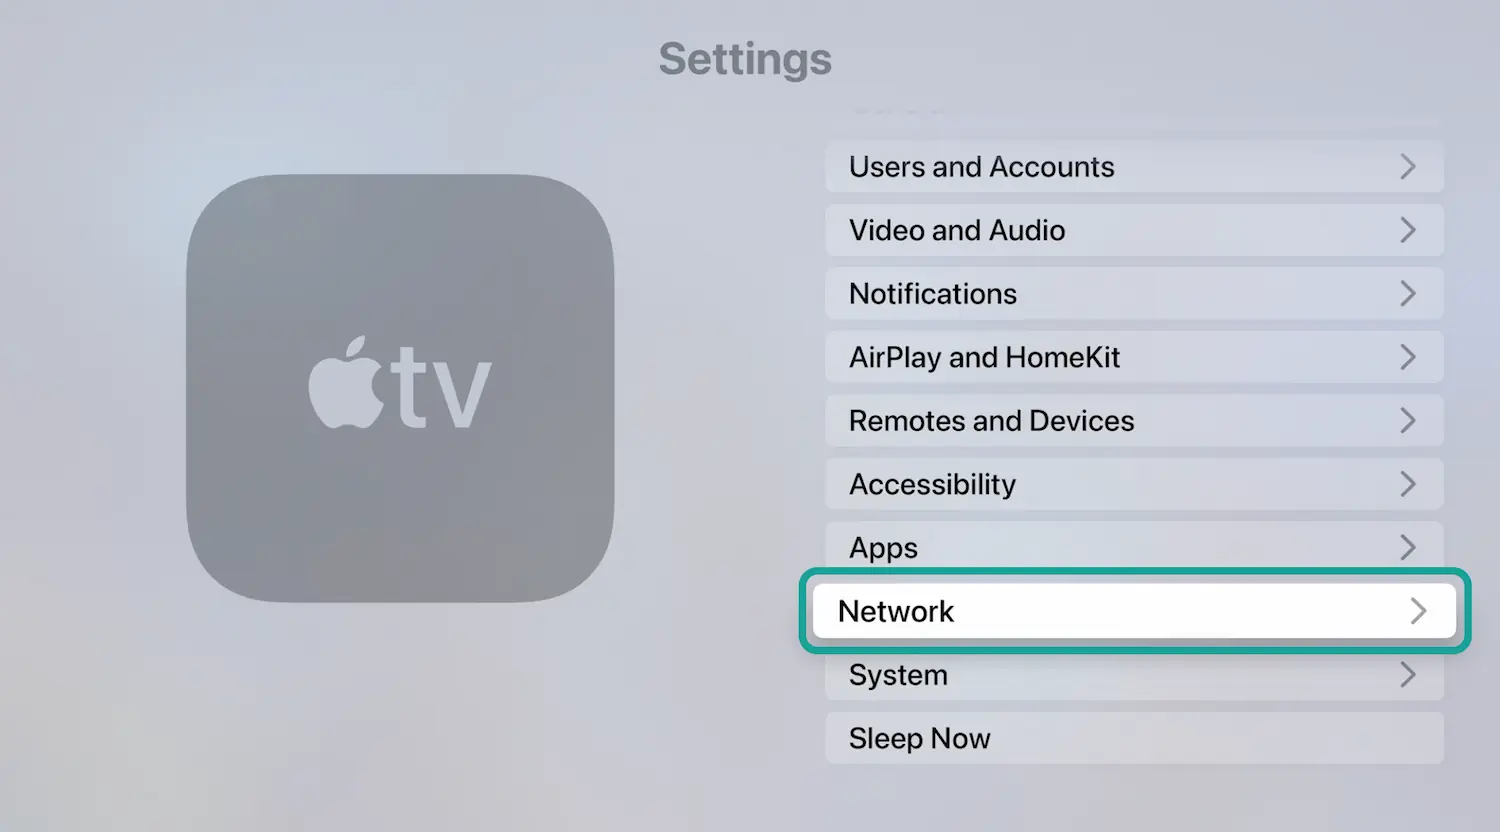
- Open the Settings app on your Apple TV.
- Select your network: Navigate to Settings > Network > WiFi. Then, tap the name of your WiFi network.
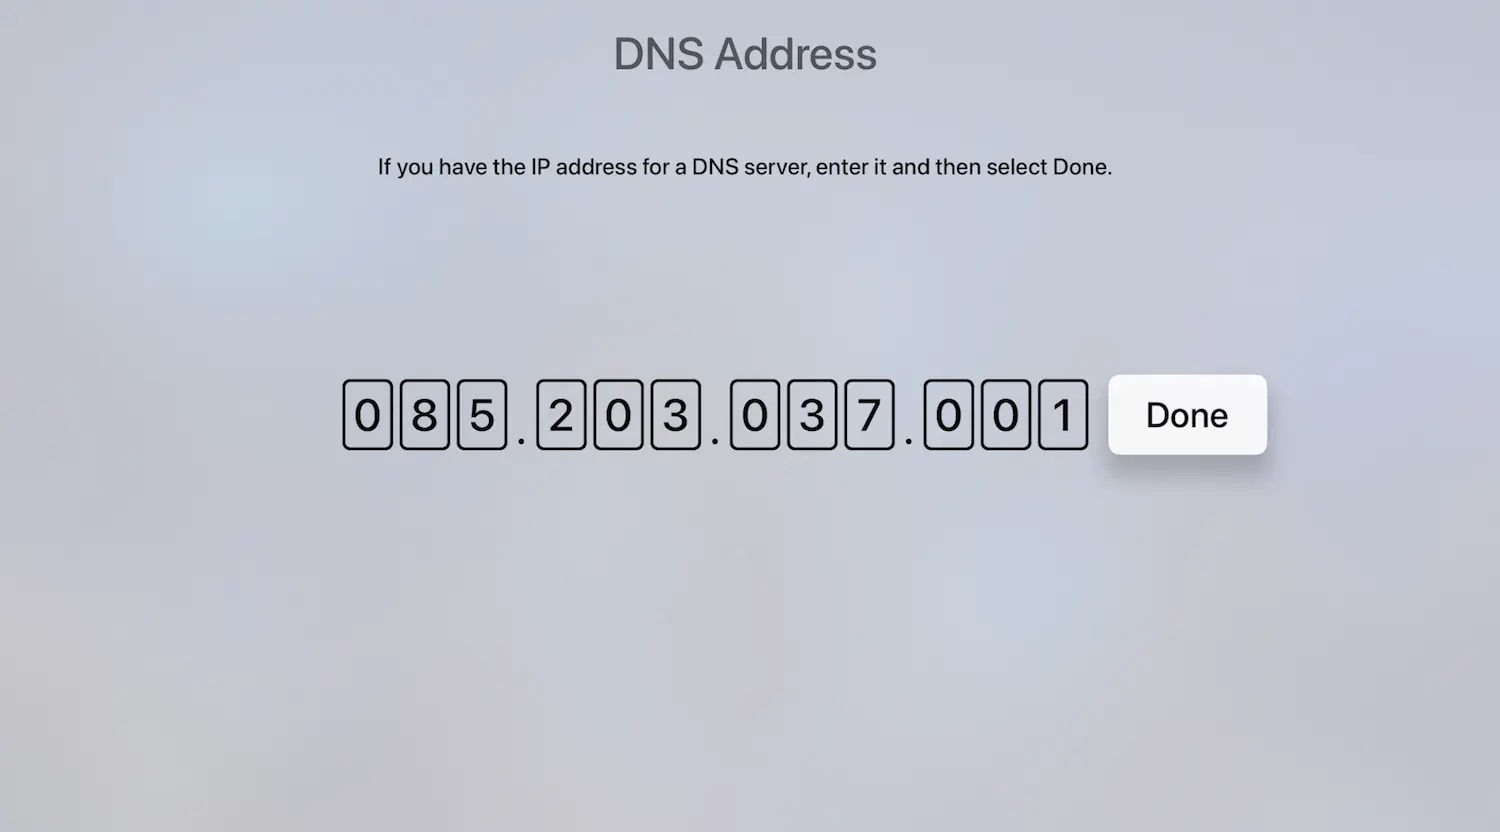
- Change DNS settings to manual: Find Configure DNS and change the settings from Automatic to Manual.
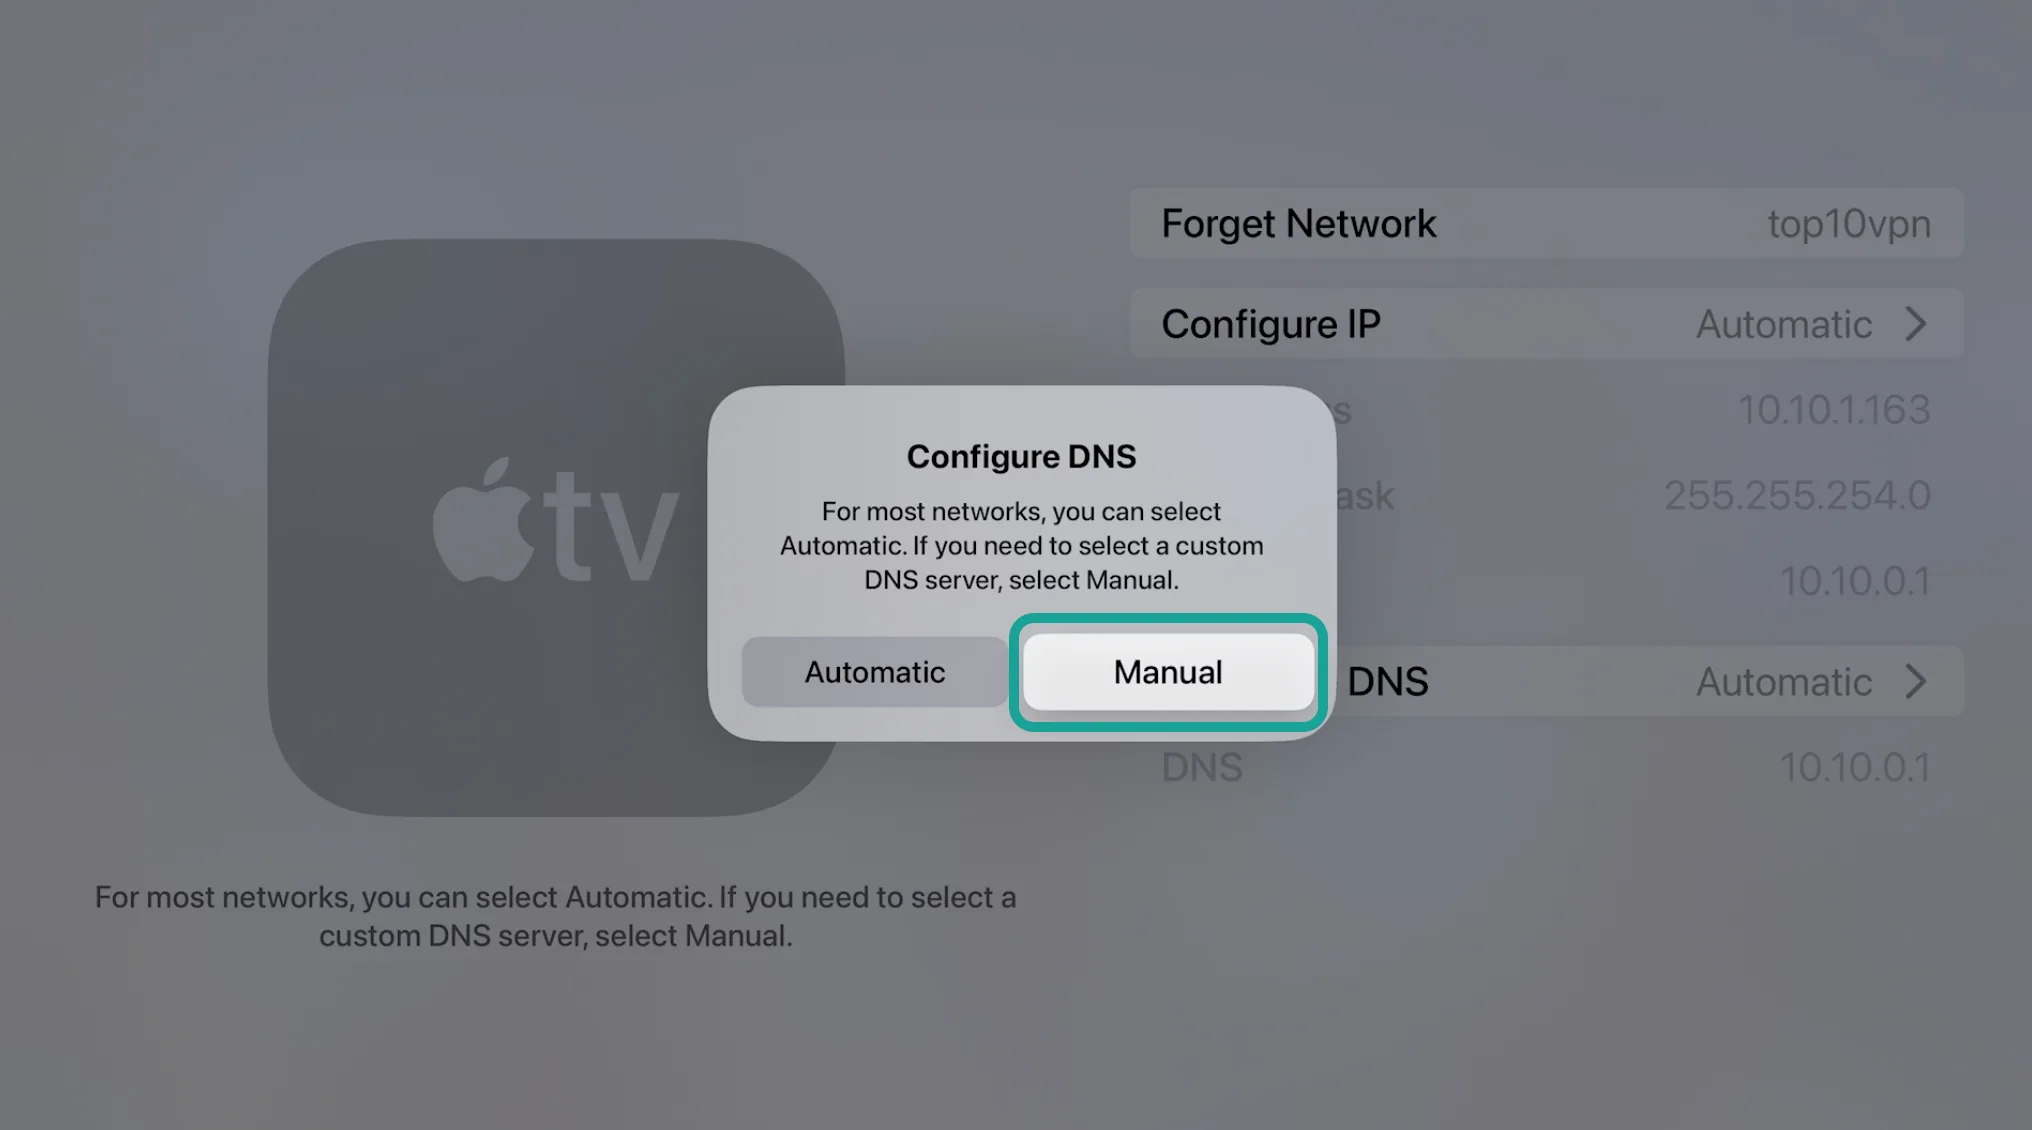
- Enter the Smart DNS address: Using your remote, enter the DNS address from step 4. Then, select Done.
- Restart your Apple TV: This clears the cache, allowing apps to display content based on your new virtual location.
- Open the streaming app and enjoy the previously hidden content.