Top10VPN is editorially independent. We may earn commissions if you buy a VPN via our links.
How to Set Up & Use a VPN Extension on Firefox
In This Guide
It’s very quick and easy to set up a VPN add-on in your Firefox browser. In this guide we’ll walk you through how to add a VPN extension in Firefox.

Quick Guide: How to Add a VPN in Firefox
- Open your Firefox browser and go to the Browser Add-ons page.
- Search for the VPN extension you want to install.
- Select the VPN plugin and click the ‘Add to Firefox’ button.
- Launch the VPN from your toolbar and connect to a VPN server.
You can use a VPN extension for Firefox to change your IP address, unblock restricted websites, and conceal your browser traffic. VPN add-ons with full encryption can also protect you from traffic interception on insecure public WiFi networks.
In this guide, we’ll explain how to install a VPN add-on in Firefox to enhance the security and privacy of your web browser traffic.
We’ll also show you how to make your Firefox browser more private by adjusting a few settings.
What You’ll Need to Set up a VPN in Firefox
- The latest version of the Firefox web browser.
- A free or paid-for VPN subscription.
Method 1: Set Up a VPN Add-on Directly from Firefox
This is the quickest and easiest method for adding a VPN in Firefox. The entire process took us less than a minute and it required no prior knowledge of VPN software.
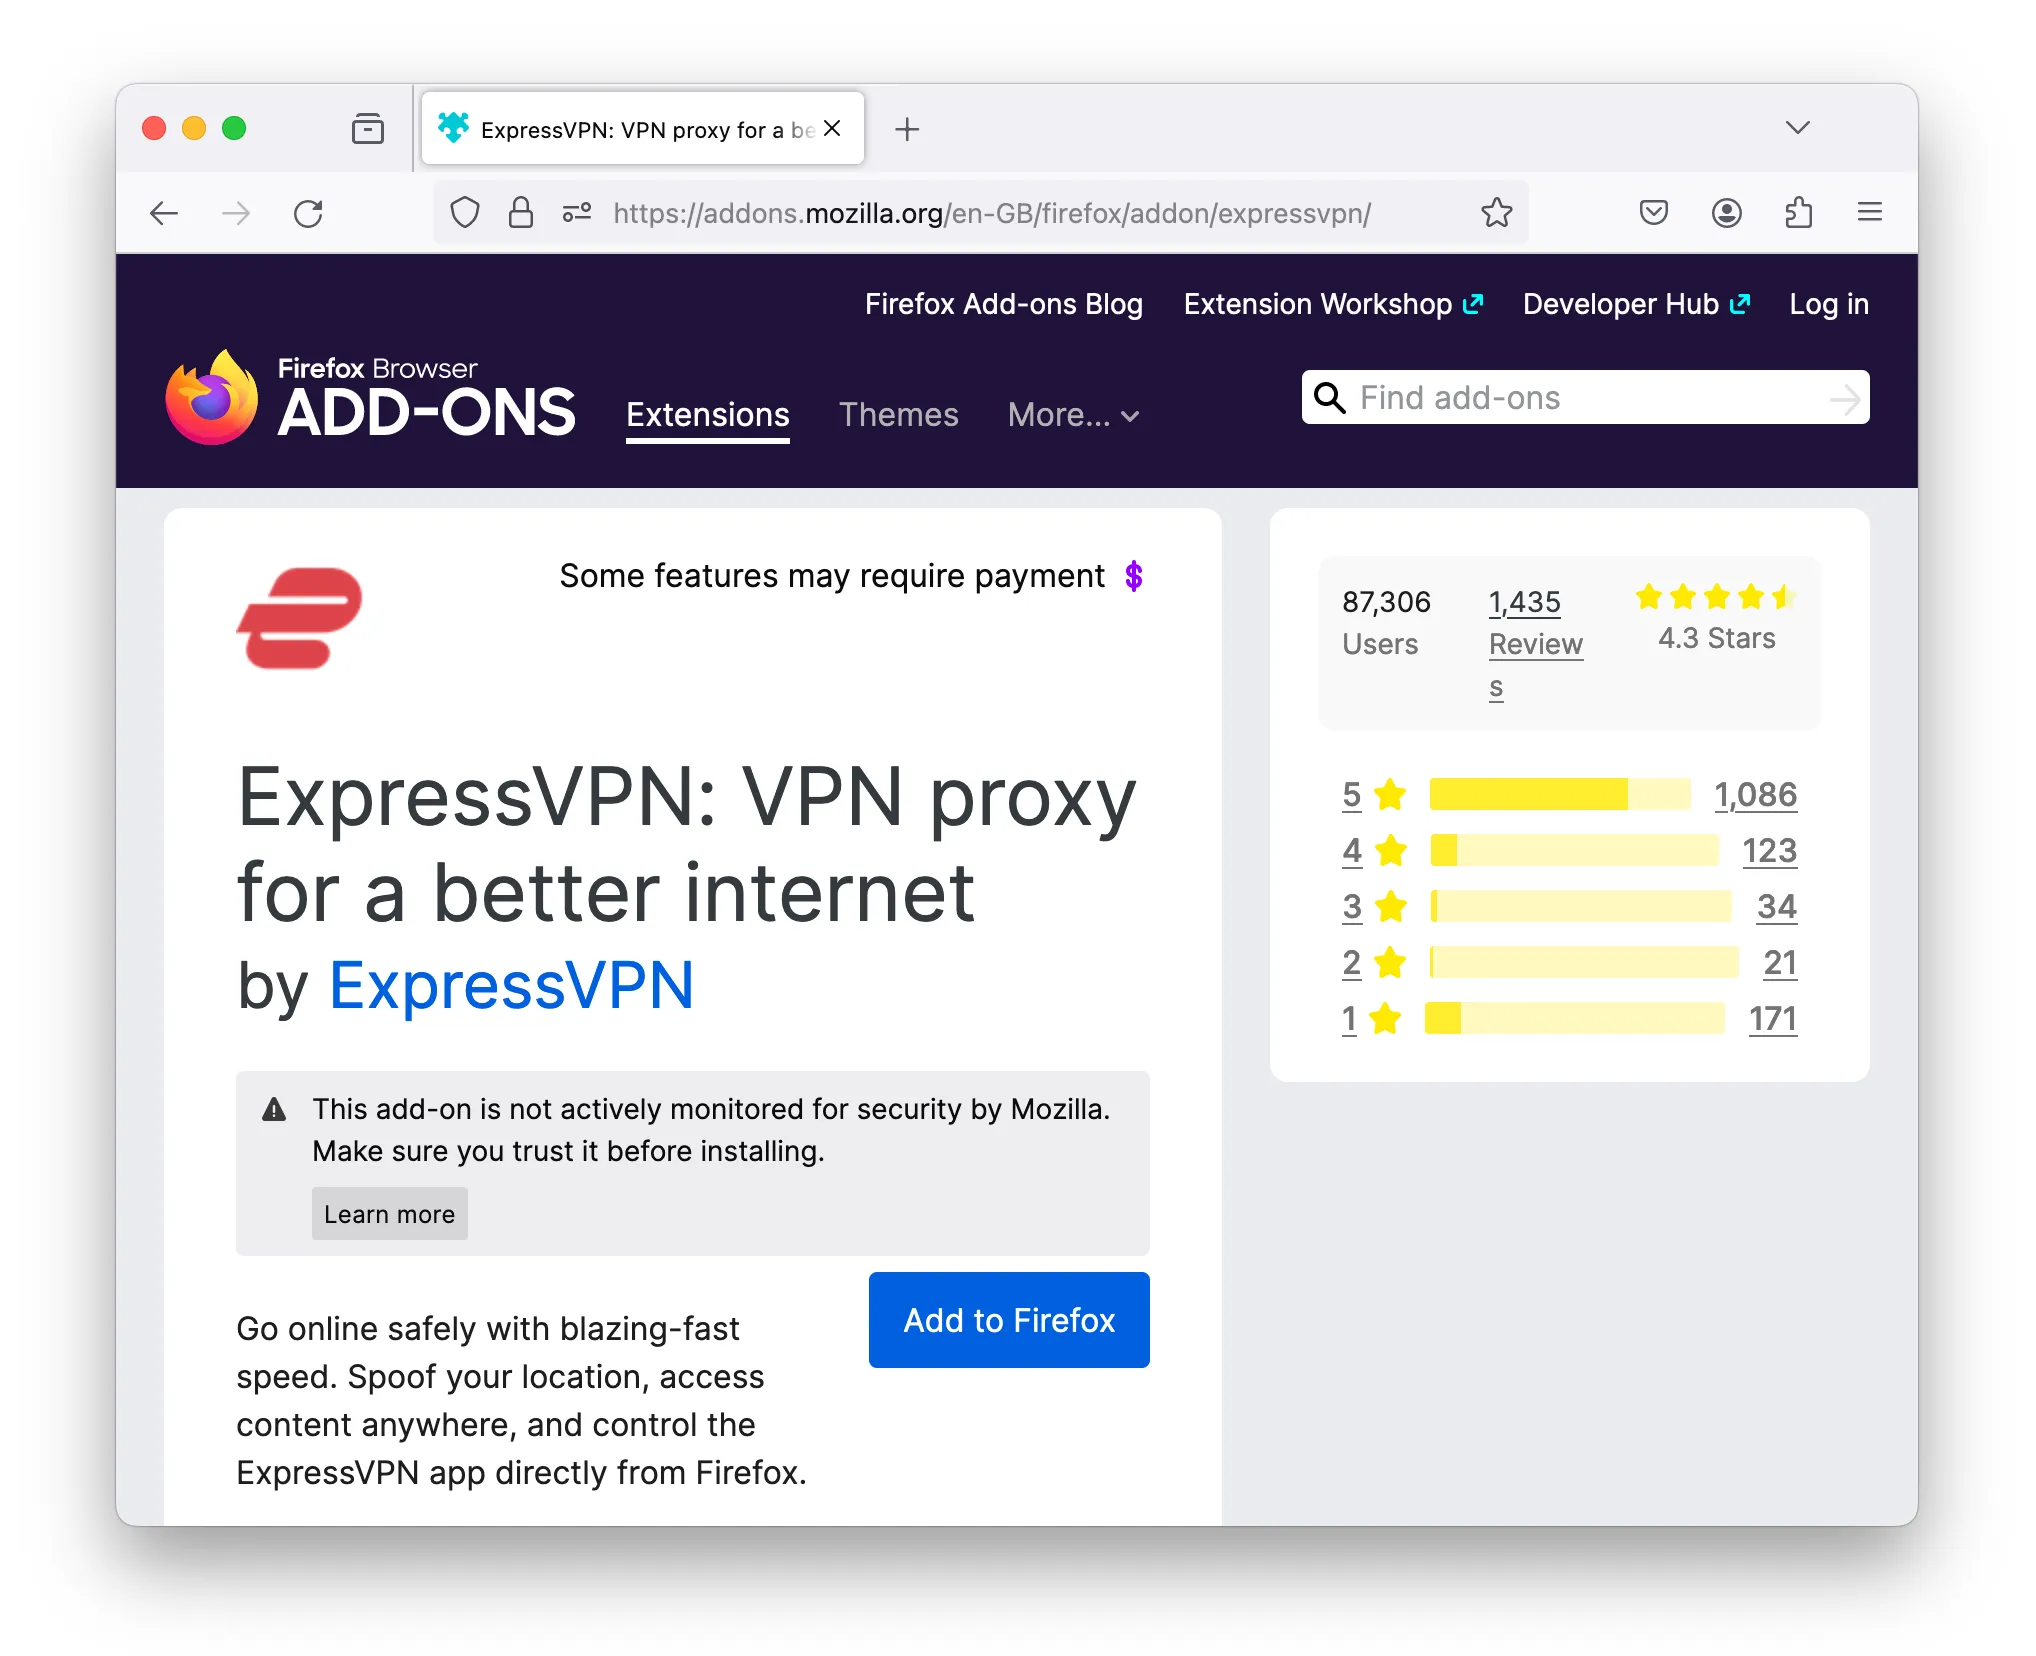
We’ve demonstrated how simple this is using ExpressVPN below:
- Find the download link for your chosen VPN extension. This can usually be found on the VPN service’s website or in the Mozilla add-ons library.
- Click ‘Add to Firefox’.
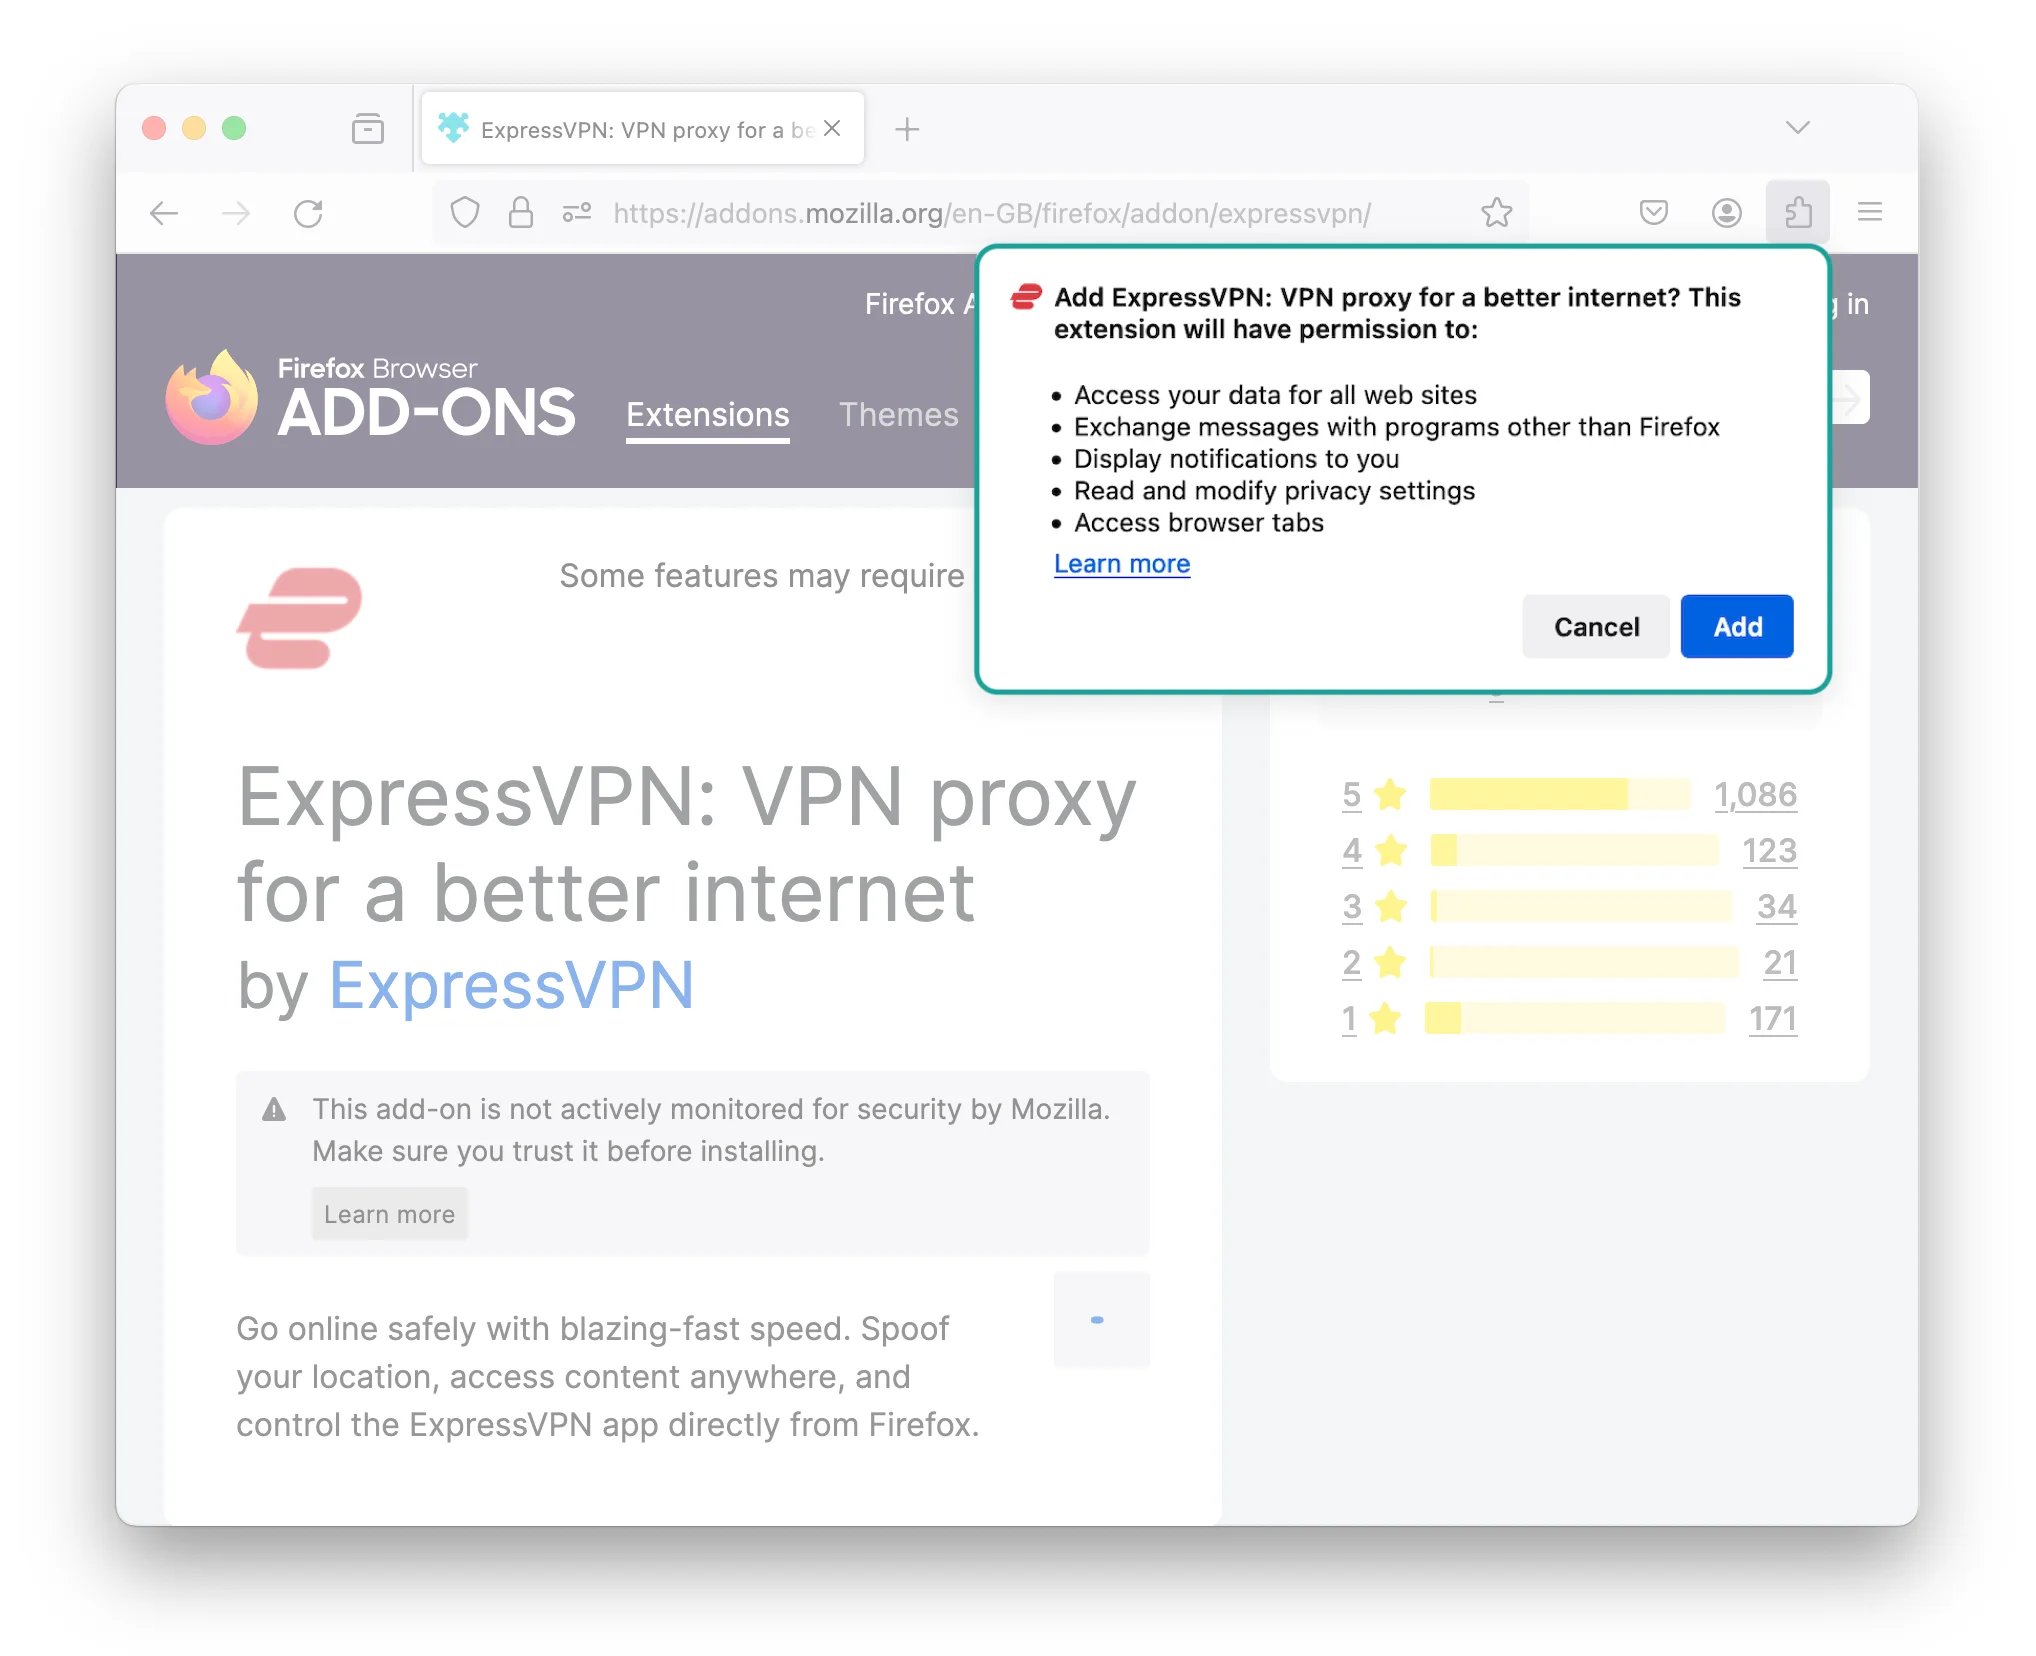
- Accept the prompts that appear. This includes a permission request and a dialog box confirming the installation.
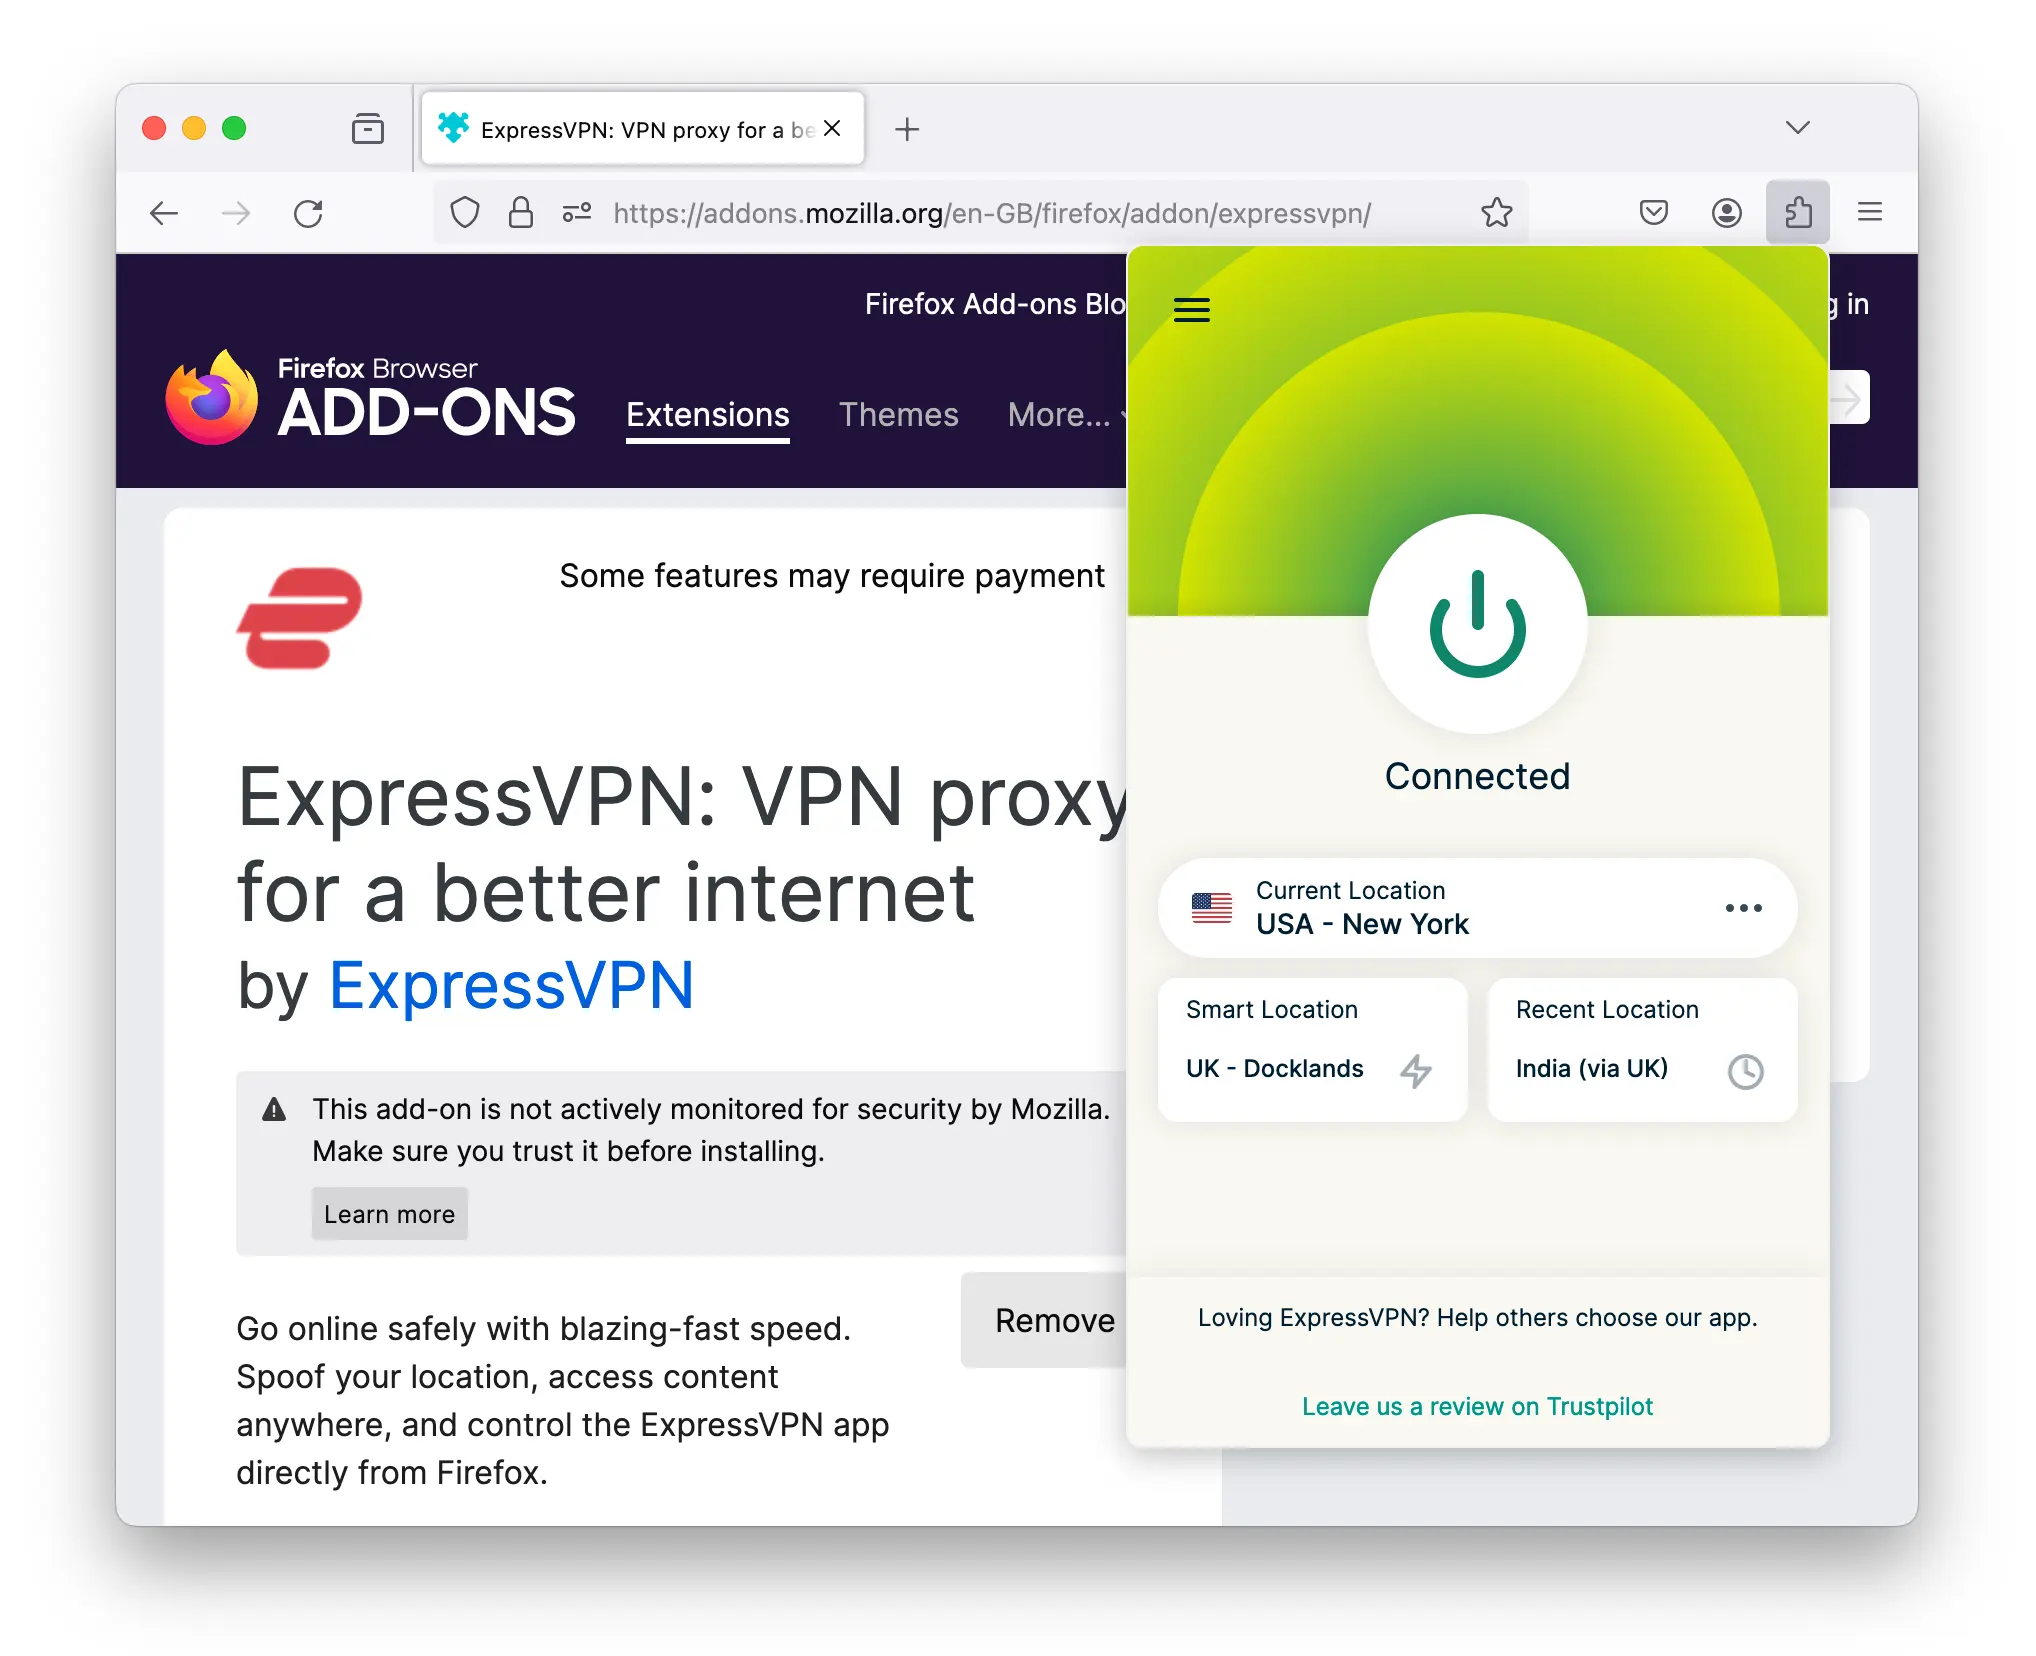
- Find the VPN Add-on in your extensions. You can find it by clicking the jigsaw symbol on your toolbar.
- Click the power button to start the VPN. For some add-ons, you may need to log in first, but this is not the case with ExpressVPN as long as you’ve installed one of its apps onto your device before.
Method 2: Manually Configure a Browser Proxy
If you don’t want to install a VPN extension, or you can’t due to network restrictions, you can still spoof your online location by manually configuring a proxy.
This operates at a browser-level and allows you to replace your real IP address with that of a proxy server.
Due to a bug that blocks authentication on Firefox, you can’t use a paid-for service such as a SOCKS5 VPN. If you want to use a premium service then you’ll need to install an add-on that allows proxy customization such as FoxyProxy.
As such, the manual configuration method only works with free proxies which are usually unencrypted and feature on IP blocklists. We only suggest using them if online anonymity isn’t a concern.
In the example below, we’ve used a free SOCKS5 proxy from ProxyScrape.com:
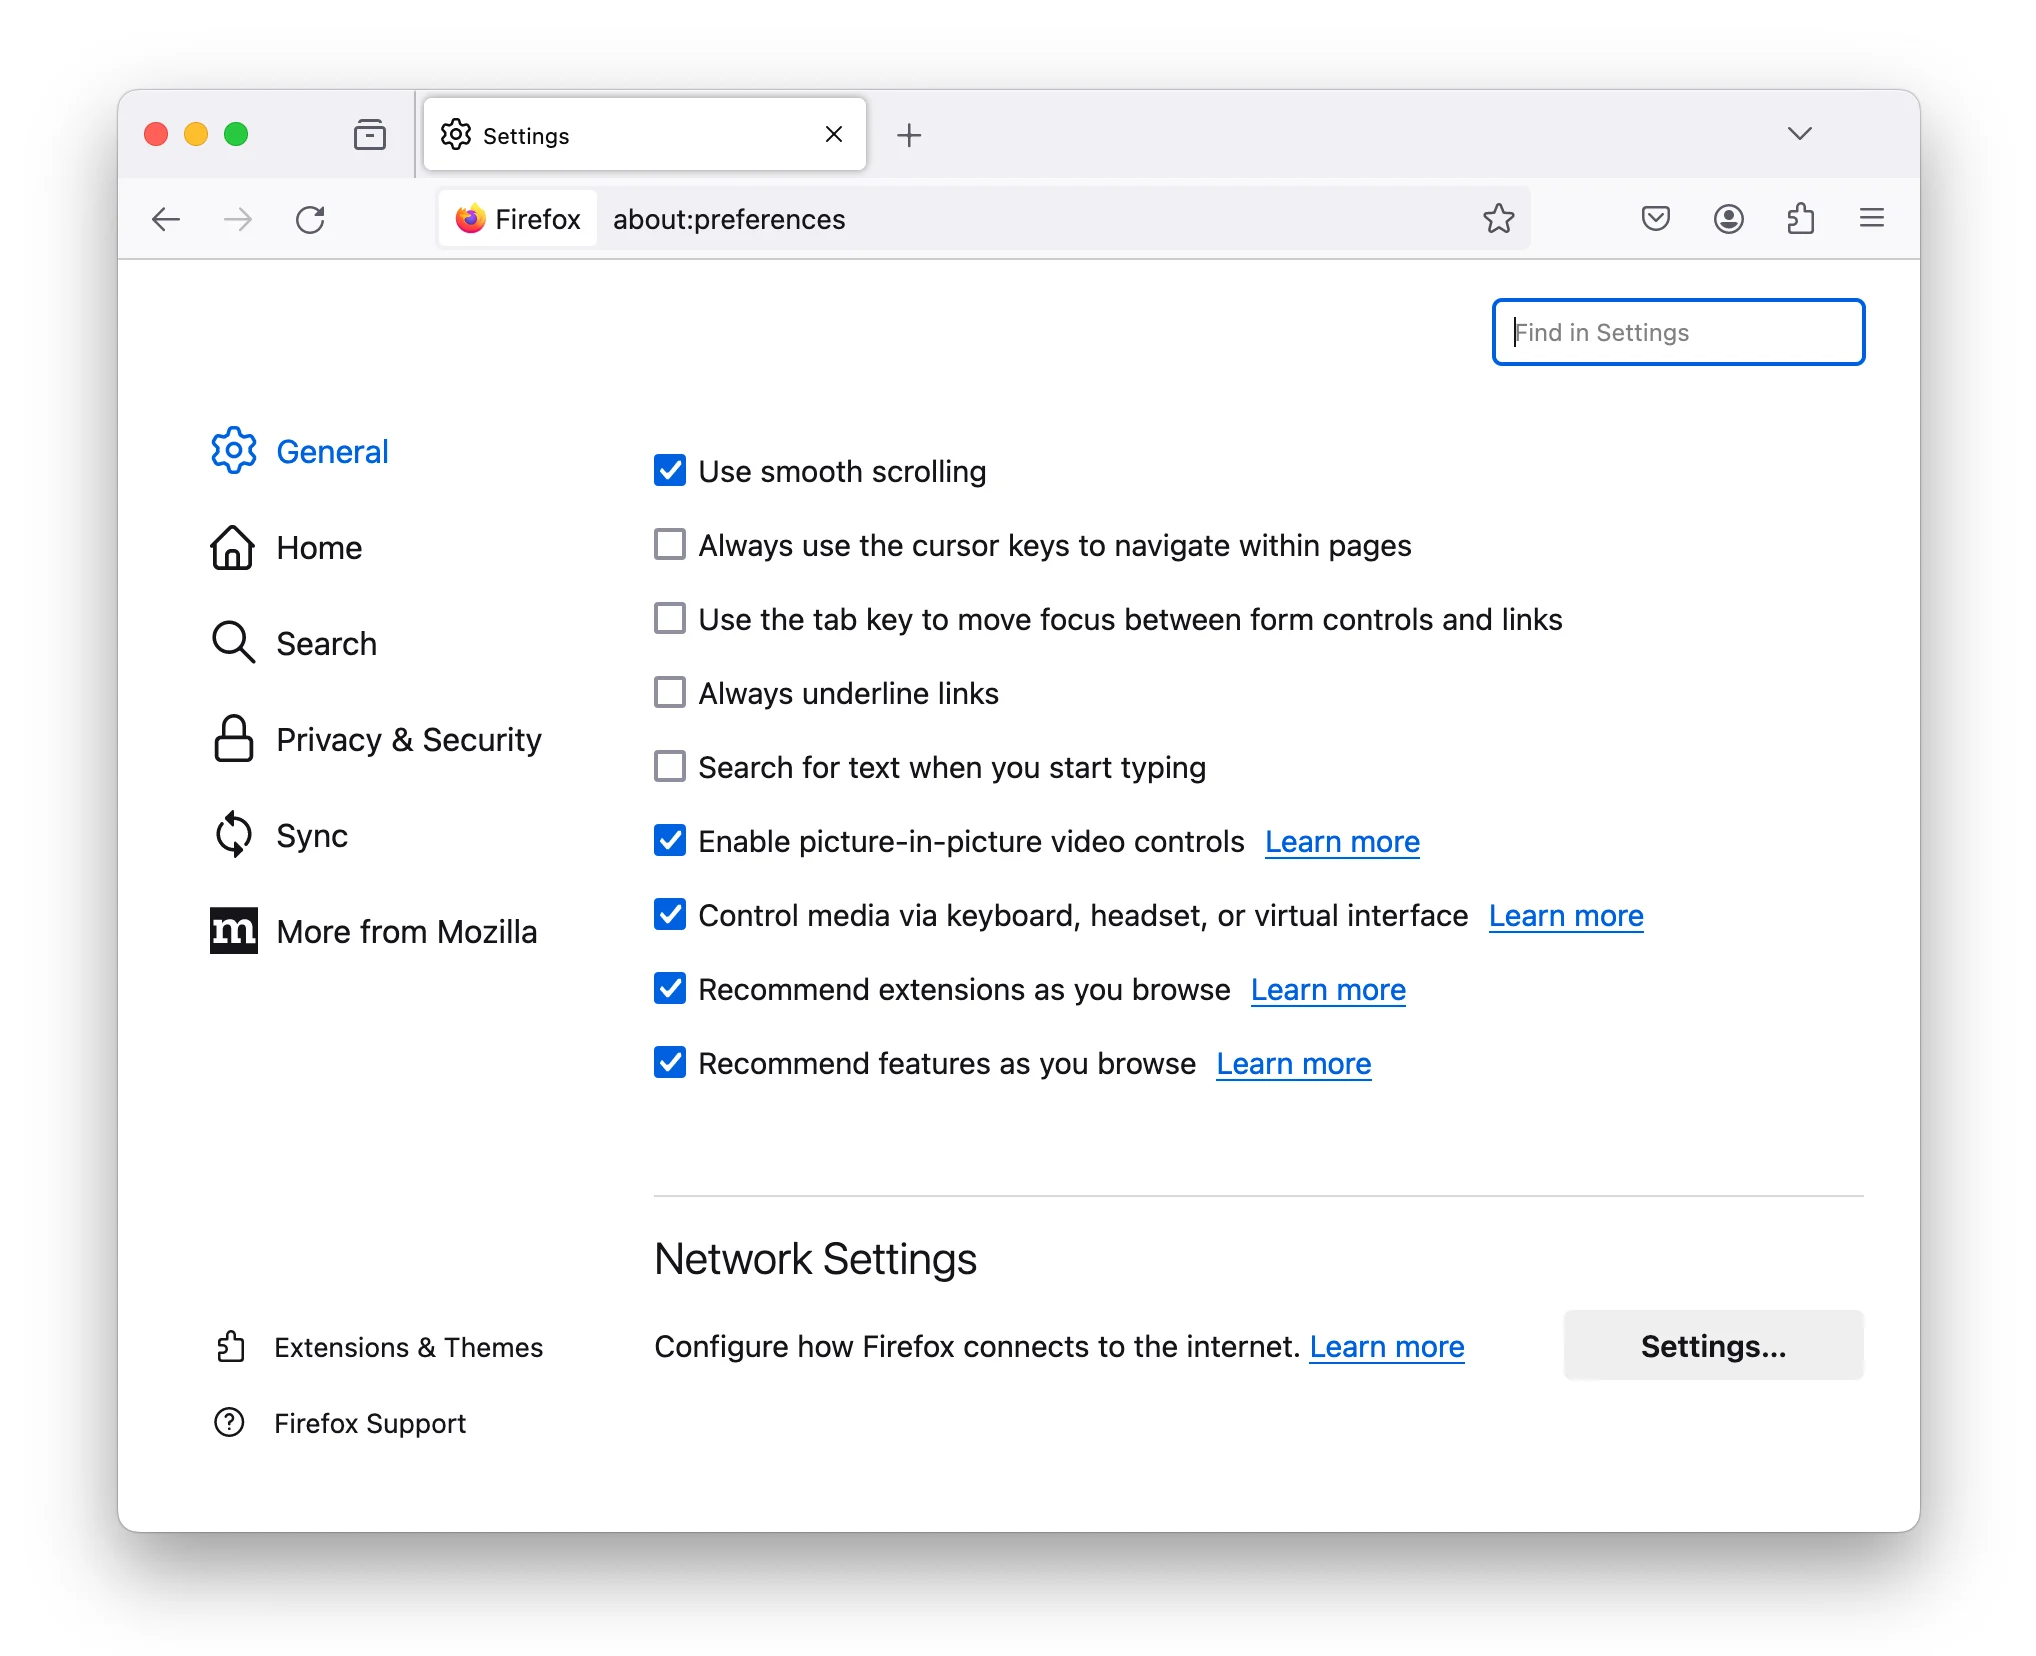
- Go to your Firefox settings. Click on the hamburger menu in the top-right corner and then click Settings.
- Locate your network settings. On the General tab scroll down to Network Settings and click the button labeled ‘Settings’.
- Tick ‘manual proxy configuration’.
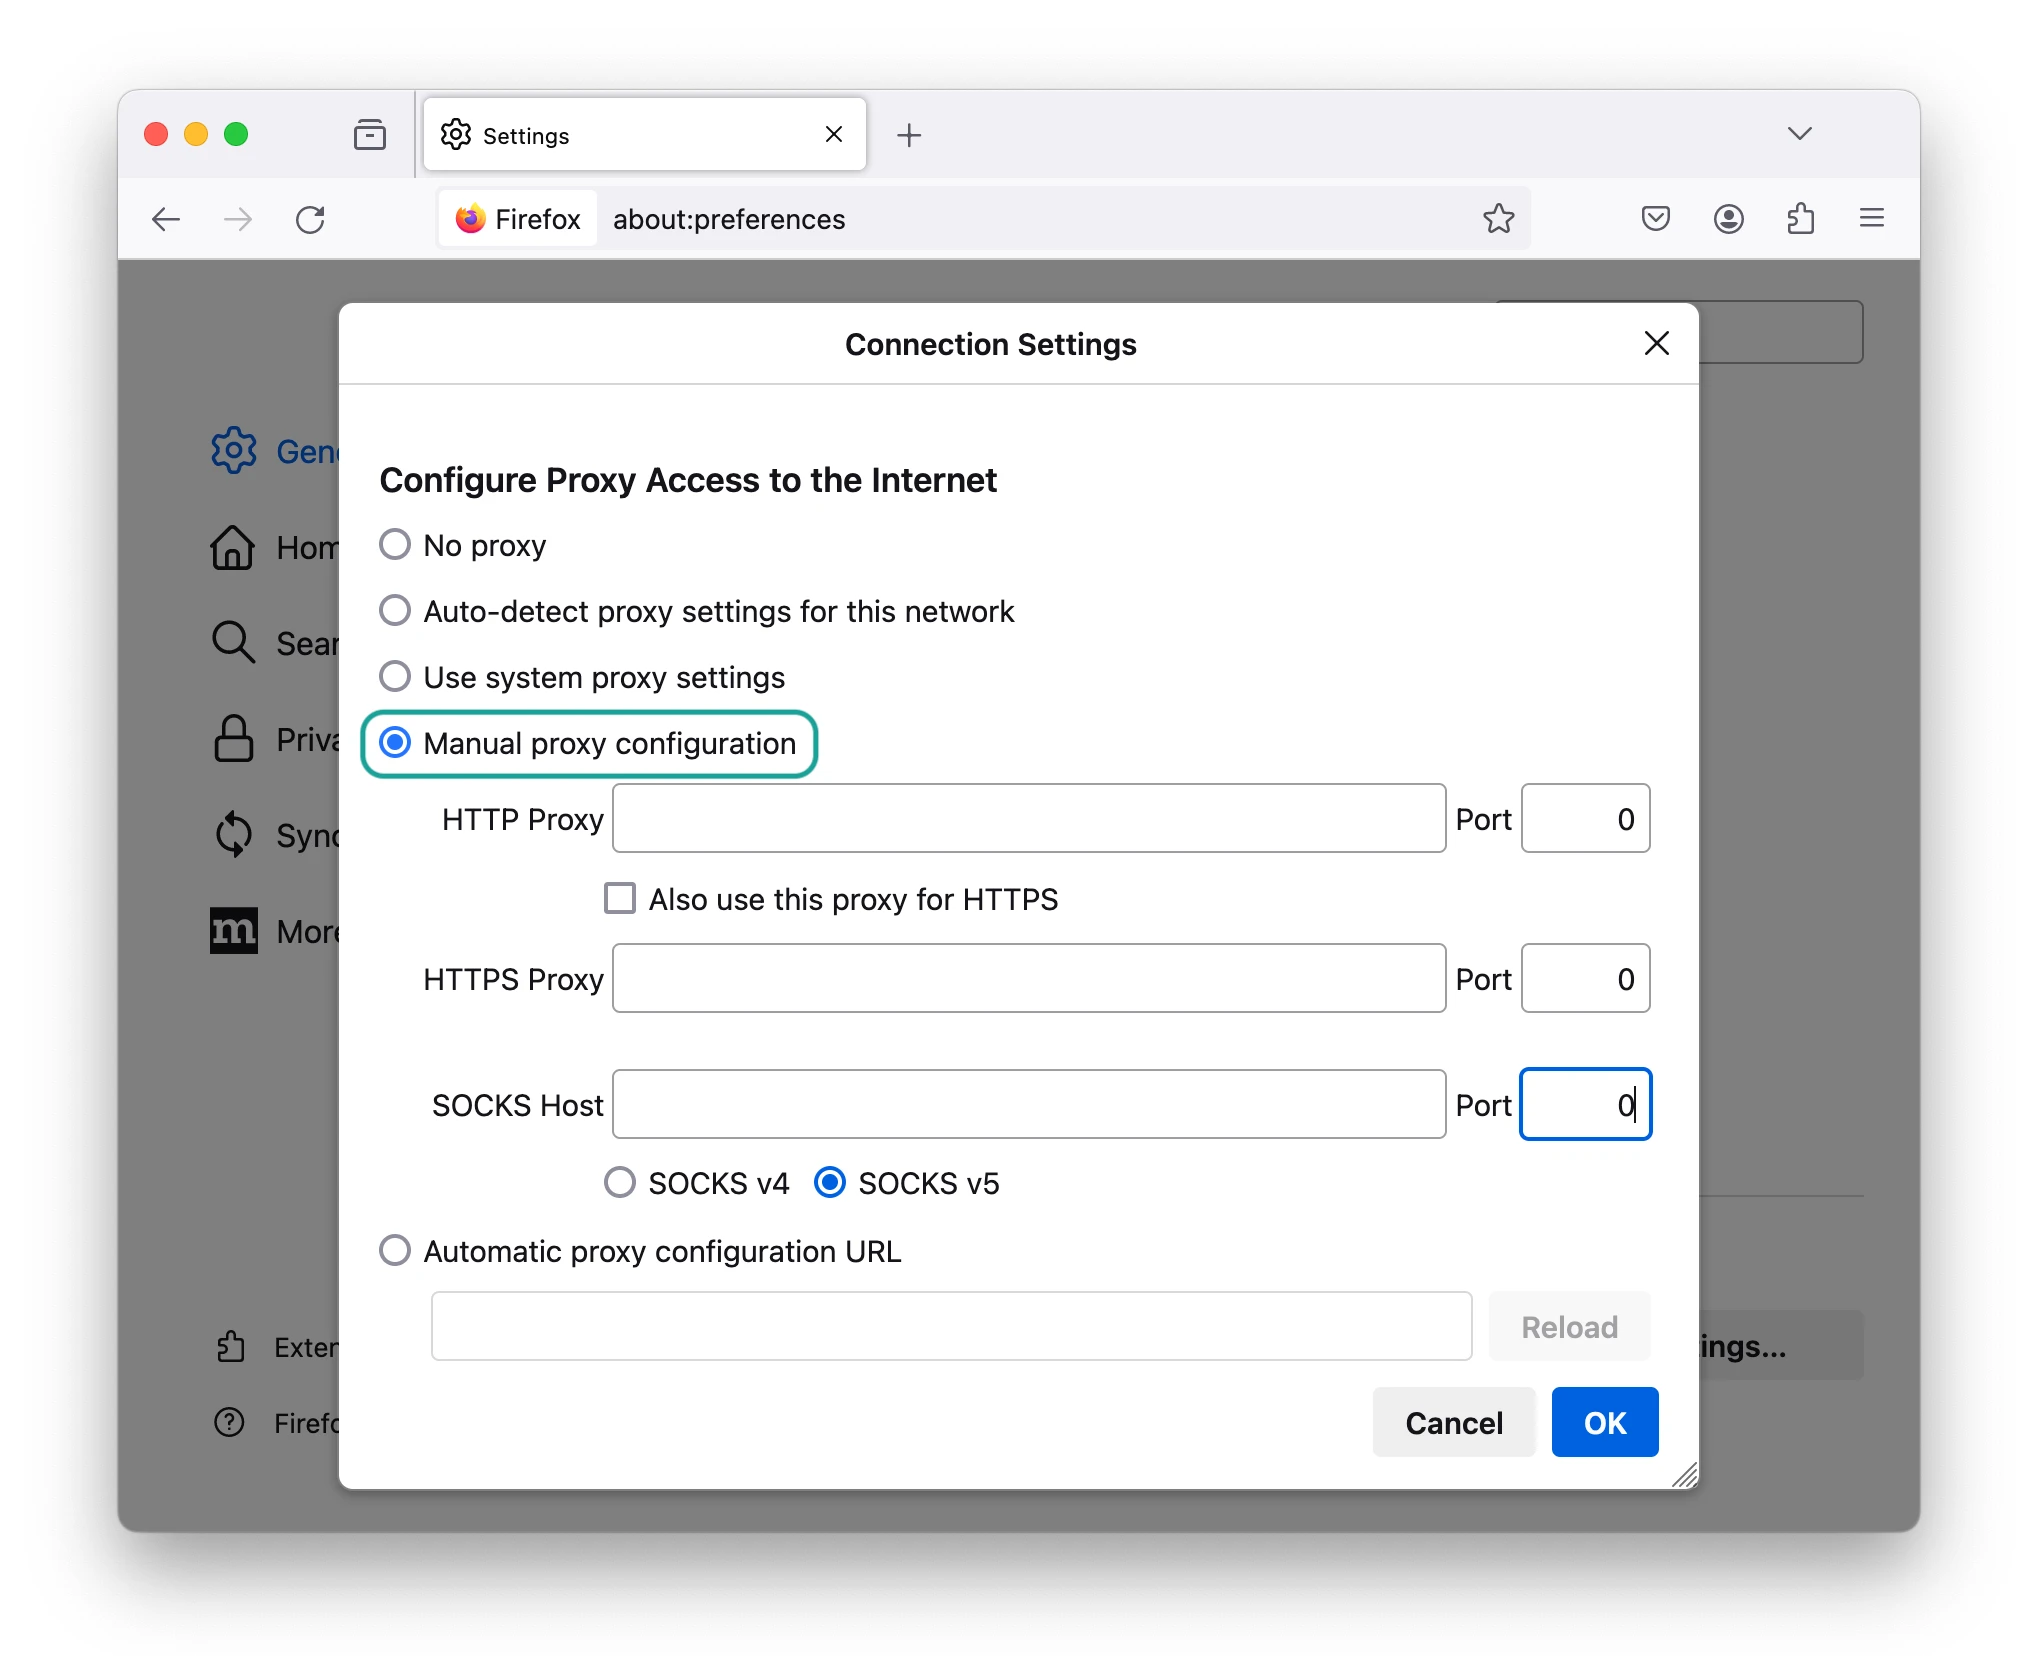
- Enter your proxy’s IP address and port number. This will vary depending on the type of proxy and the distributor you’re using:
- For HTTP: Enter the IP address into HTTP Proxy and use port number 80 unless otherwise specified.
- For HTTPS Proxy: Enter the IP address into HTTPS Proxy and use port number 443 unless otherwise specified.
- For SOCKS5: Enter the IP address into SOCKS5 Host, use port numbers 1080 unless otherwise specified, and tick Proxy DNS when using SOCKS5.
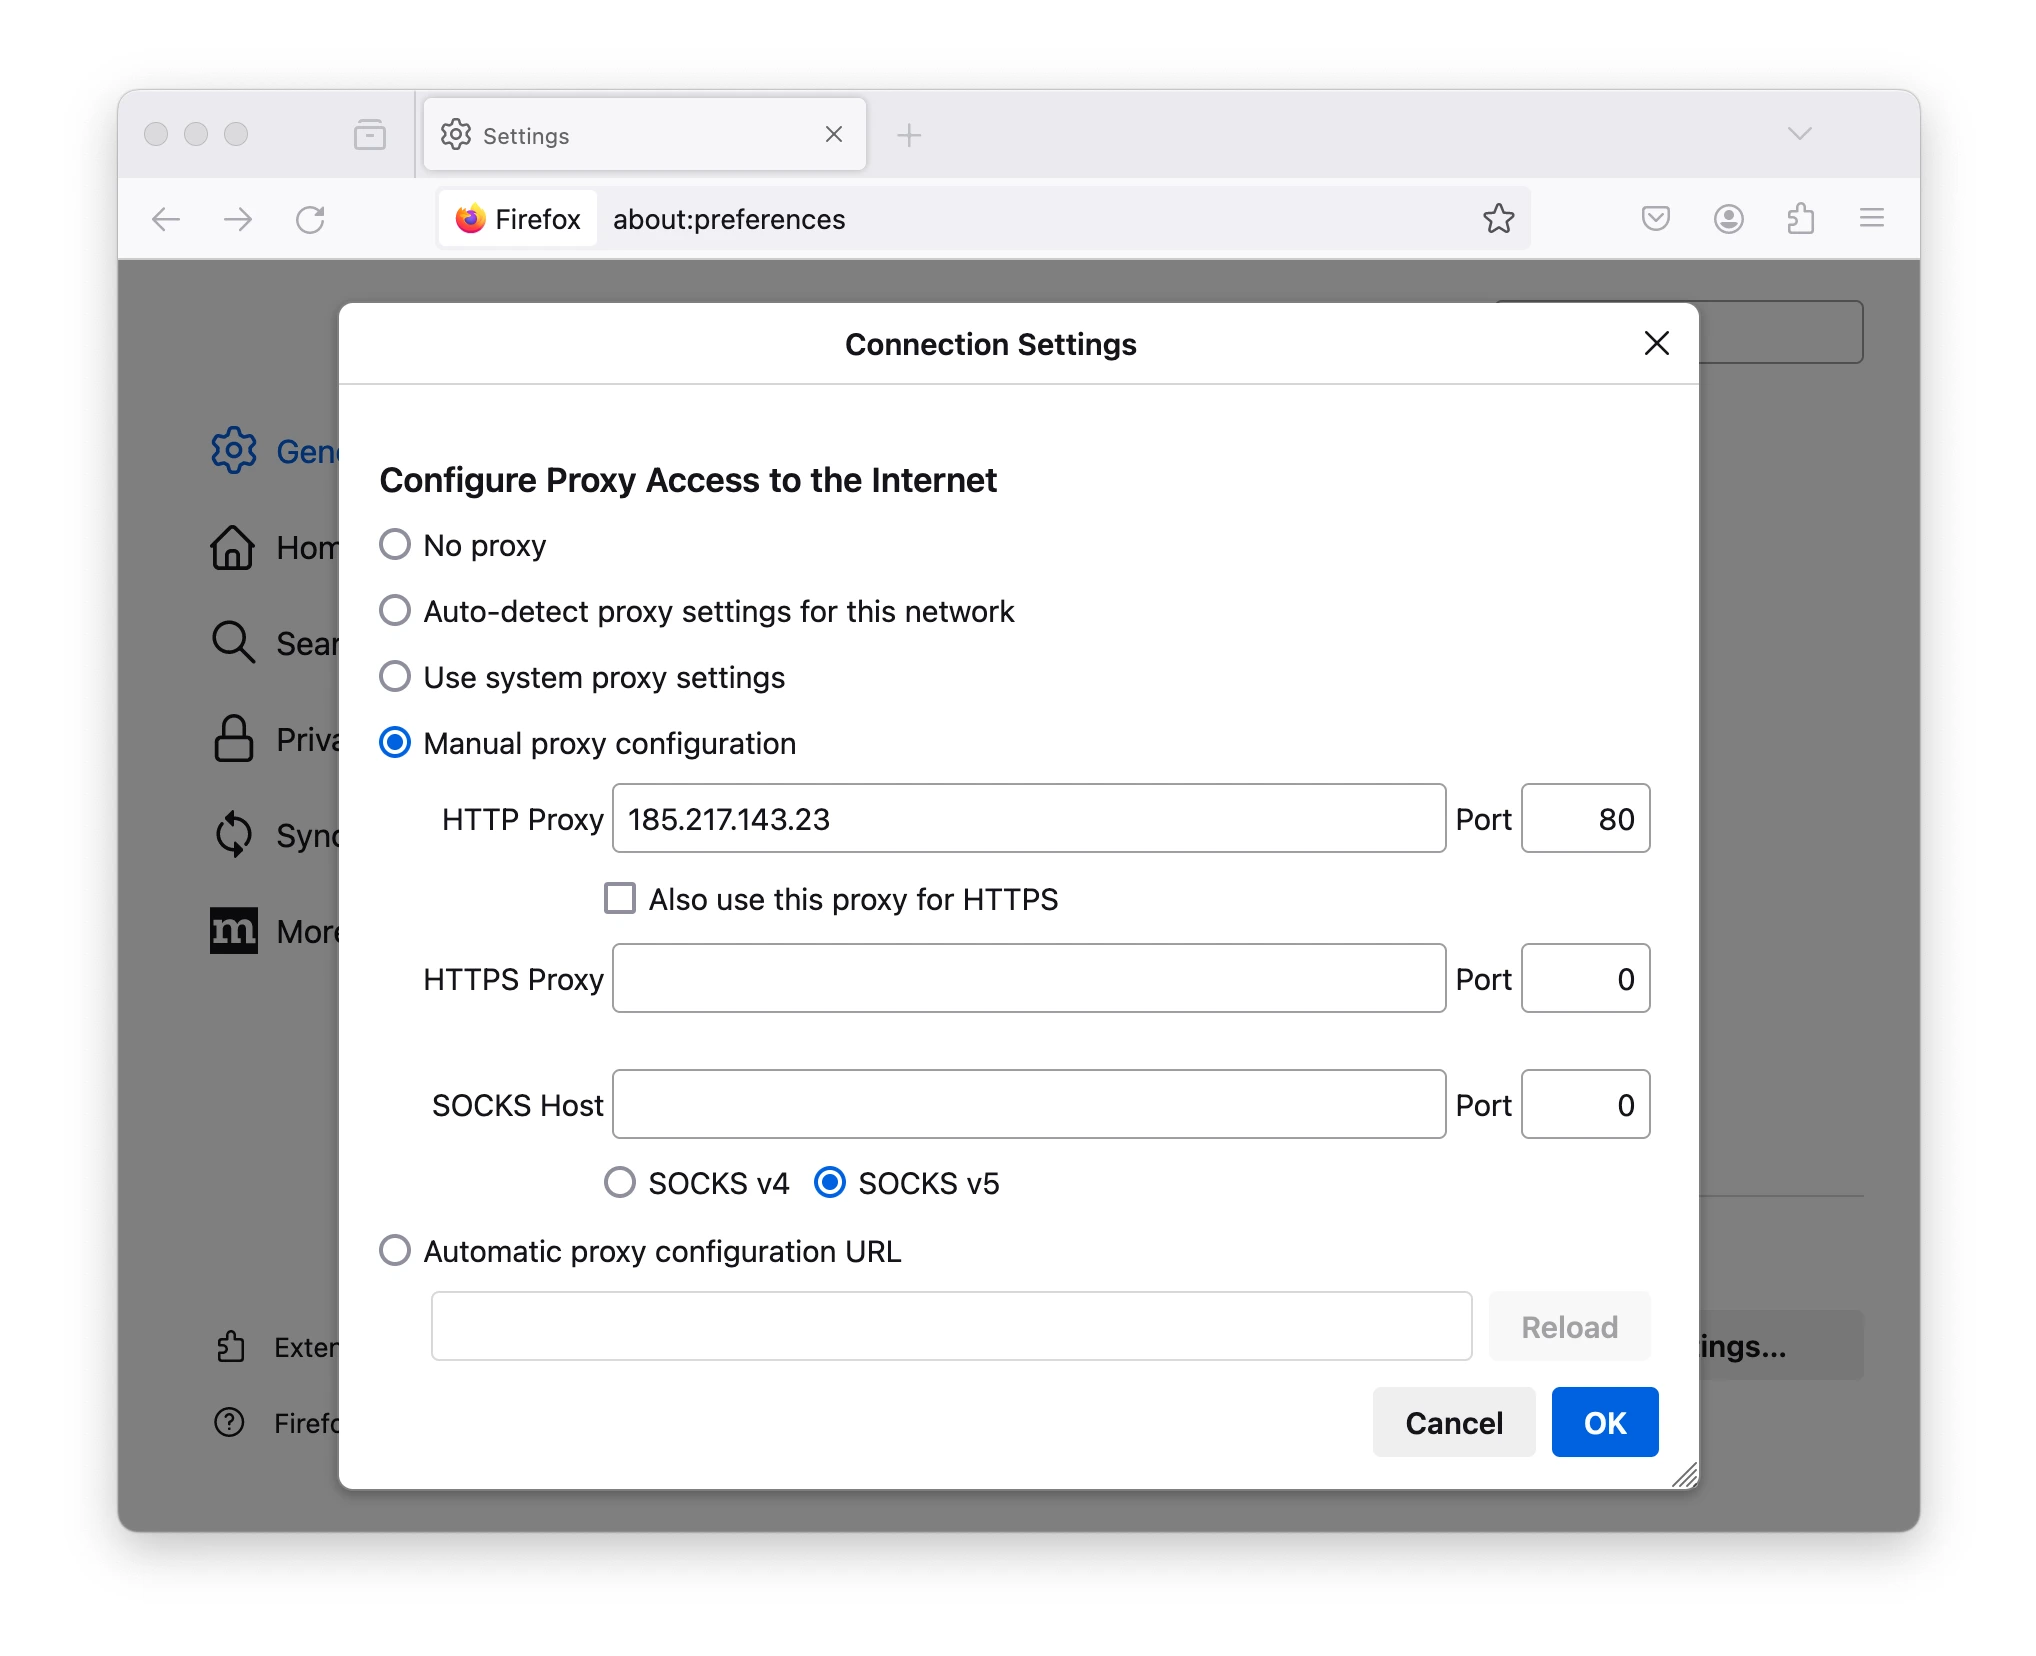
- Click ‘OK’ to confirm changes.
Unlike with a VPN extension, this method only allows you to configure one server location at any given time. If you want to change proxy location, you’ll need to repeat the above process from the start, which took us 3 minutes.
Moreover, your proxy IP may become blocked or undergo a period of downtime. If this happens, then you’ll need to choose a different proxy server and start again.
How to Uninstall a Firefox VPN Extension
If you want to switch to a different VPN add-on, or stop using one entirely, then you’ll need to uninstall the extension from Firefox.
To remove a VPN extension from Firefox:
- Click the extension icon on your browser’s toolbar. This is represented as a jigsaw piece.
- Click on your VPN add-on and select ‘Remove Extension’.
- Click ‘Remove’ on the dialog box that pops up.
If you suspect the add-on you have installed is fake or malicious, then you might want to report it first. You can do this by right clicking on its icon and clicking ‘Report Extension’.
Why Won’t My VPN Extension Work on Firefox?
You may encounter some issues setting up a VPN on Firefox, especially if you’re new to the browser.
We’ve outlined some common problems below alongside our suggested fixes:
“You need an updated version of Firefox for this extension”
This error appears due to a version incompatibility between the VPN add-on you’re trying to install and your Firefox browser.
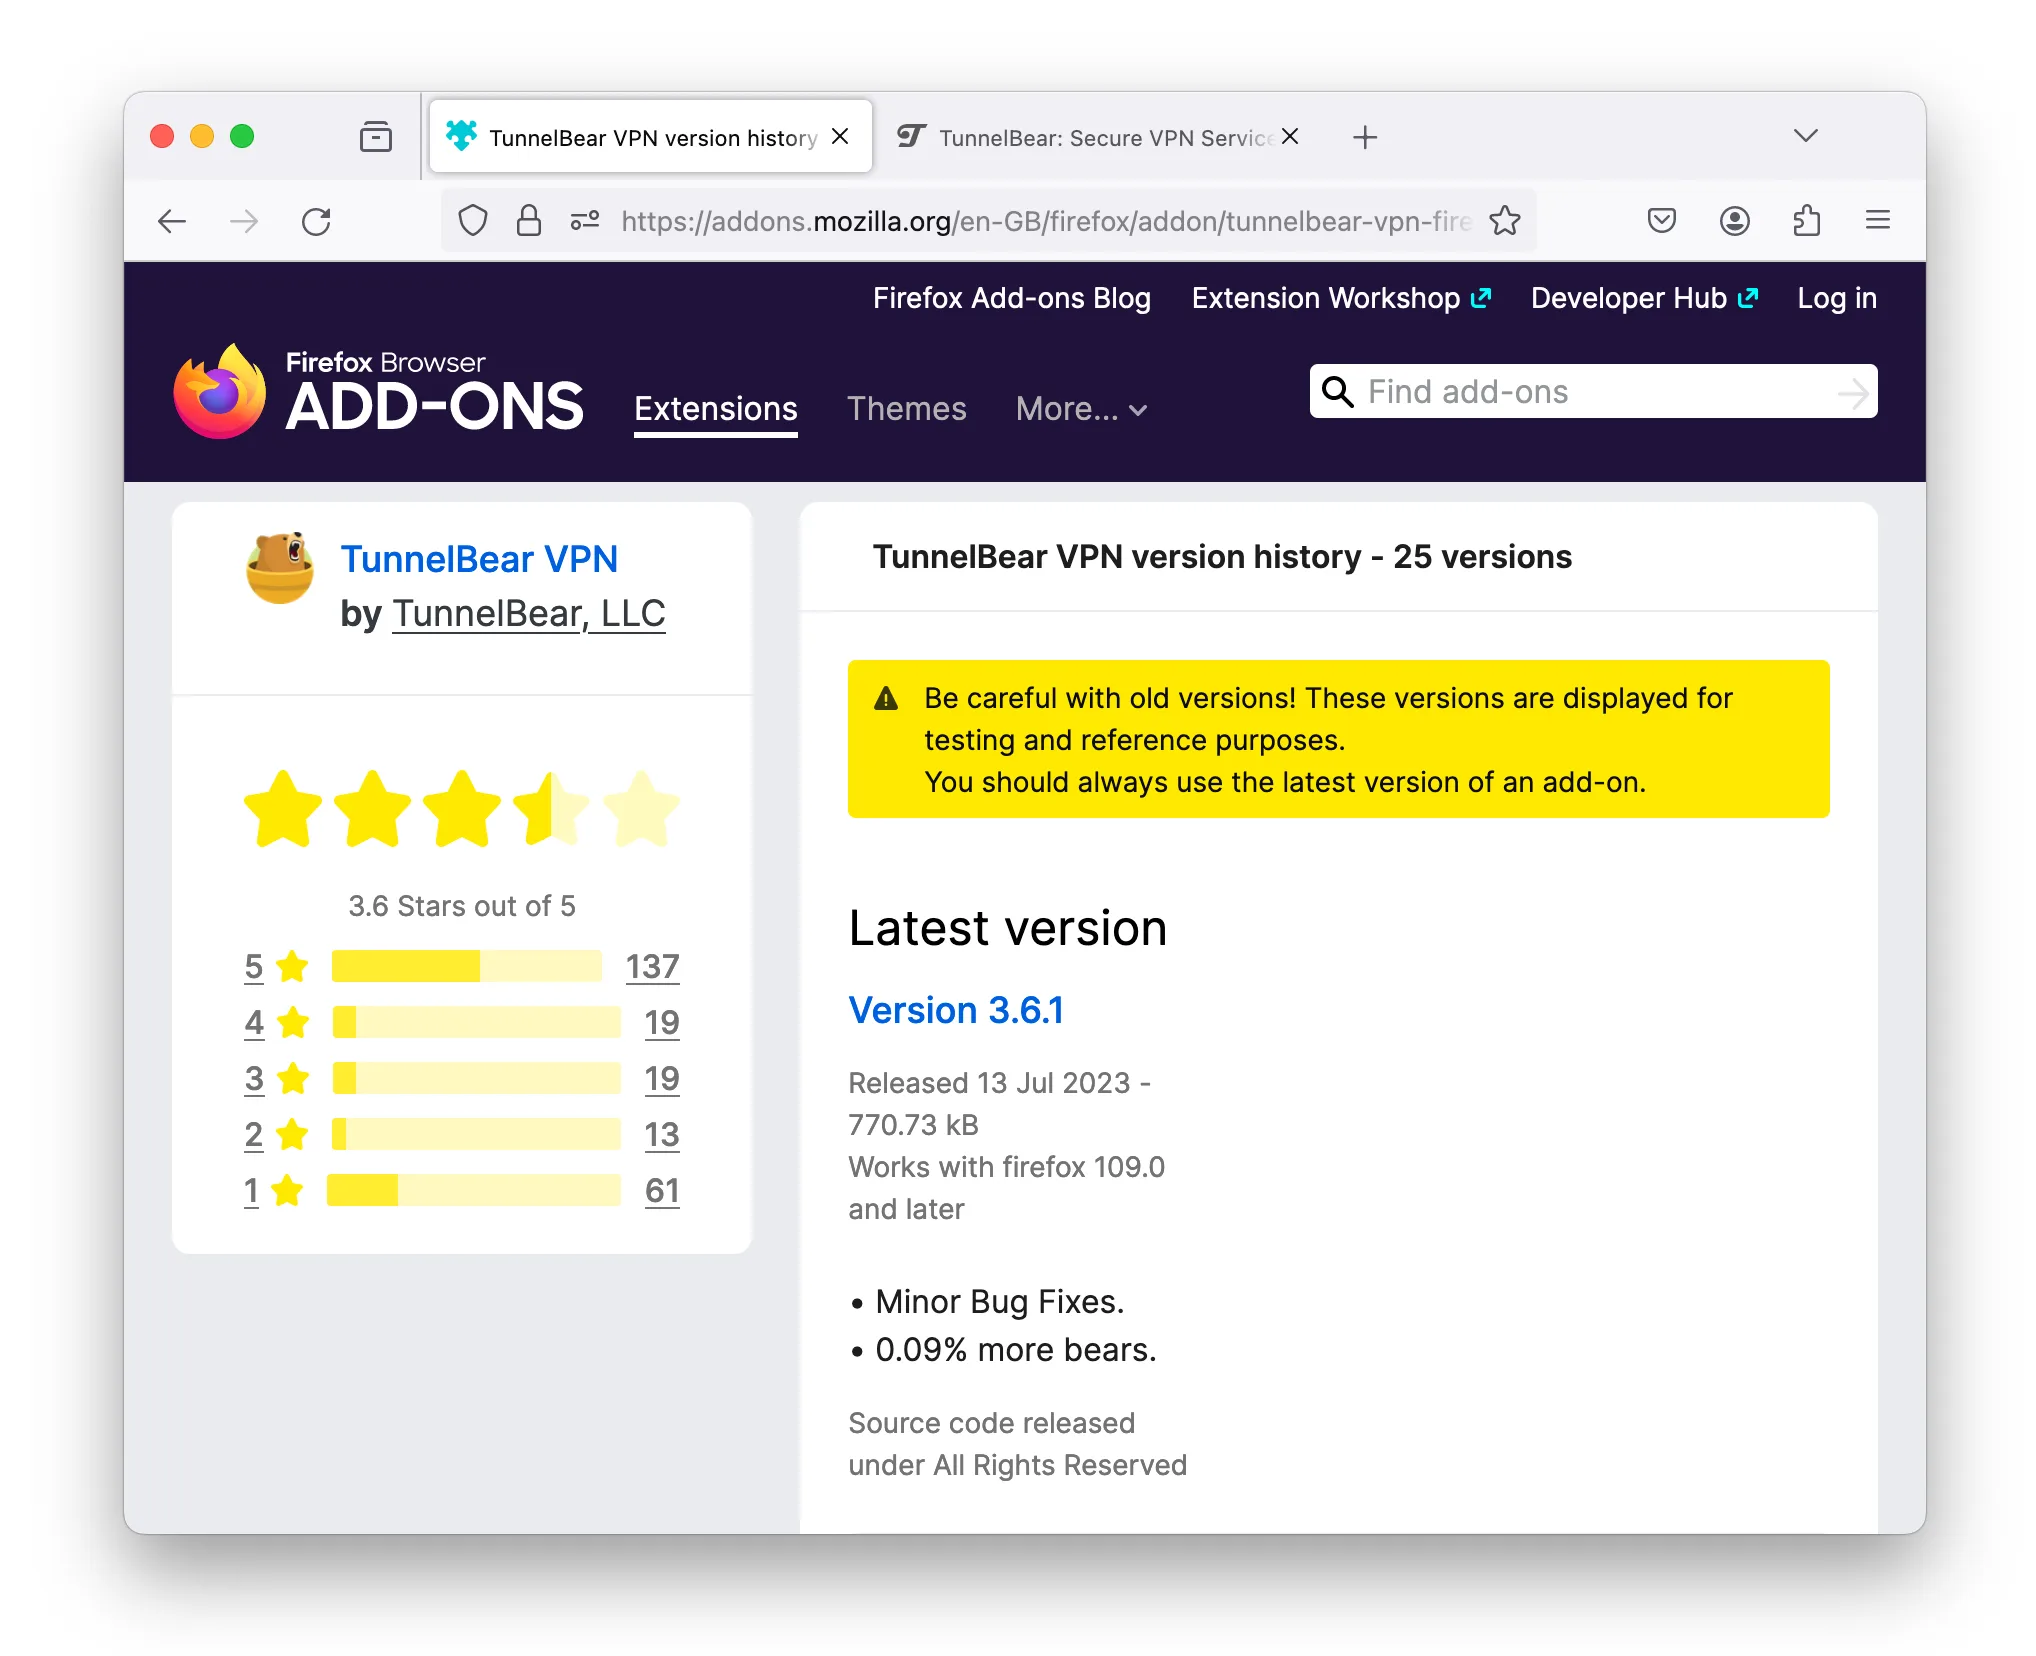
TunnelBear’s VPN extension works with the latest version of the Firefox browser.
To fix this, go to More information > See all versions on the VPN extension’s listing and identify which versions of Firefox it works with.
If your Firefox browser doesn’t fall within this range of compatible versions, then you can download its latest update by clicking the hamburger menu on the toolbar and selecting Help > About Mozilla Firefox. This will cause an update to happen automatically.
If the VPN add-on is too outdated then you may have to wait for a new version to be released or choose a different service.
“Add-on has a high risk of causing stability or security problems and can’t be installed”
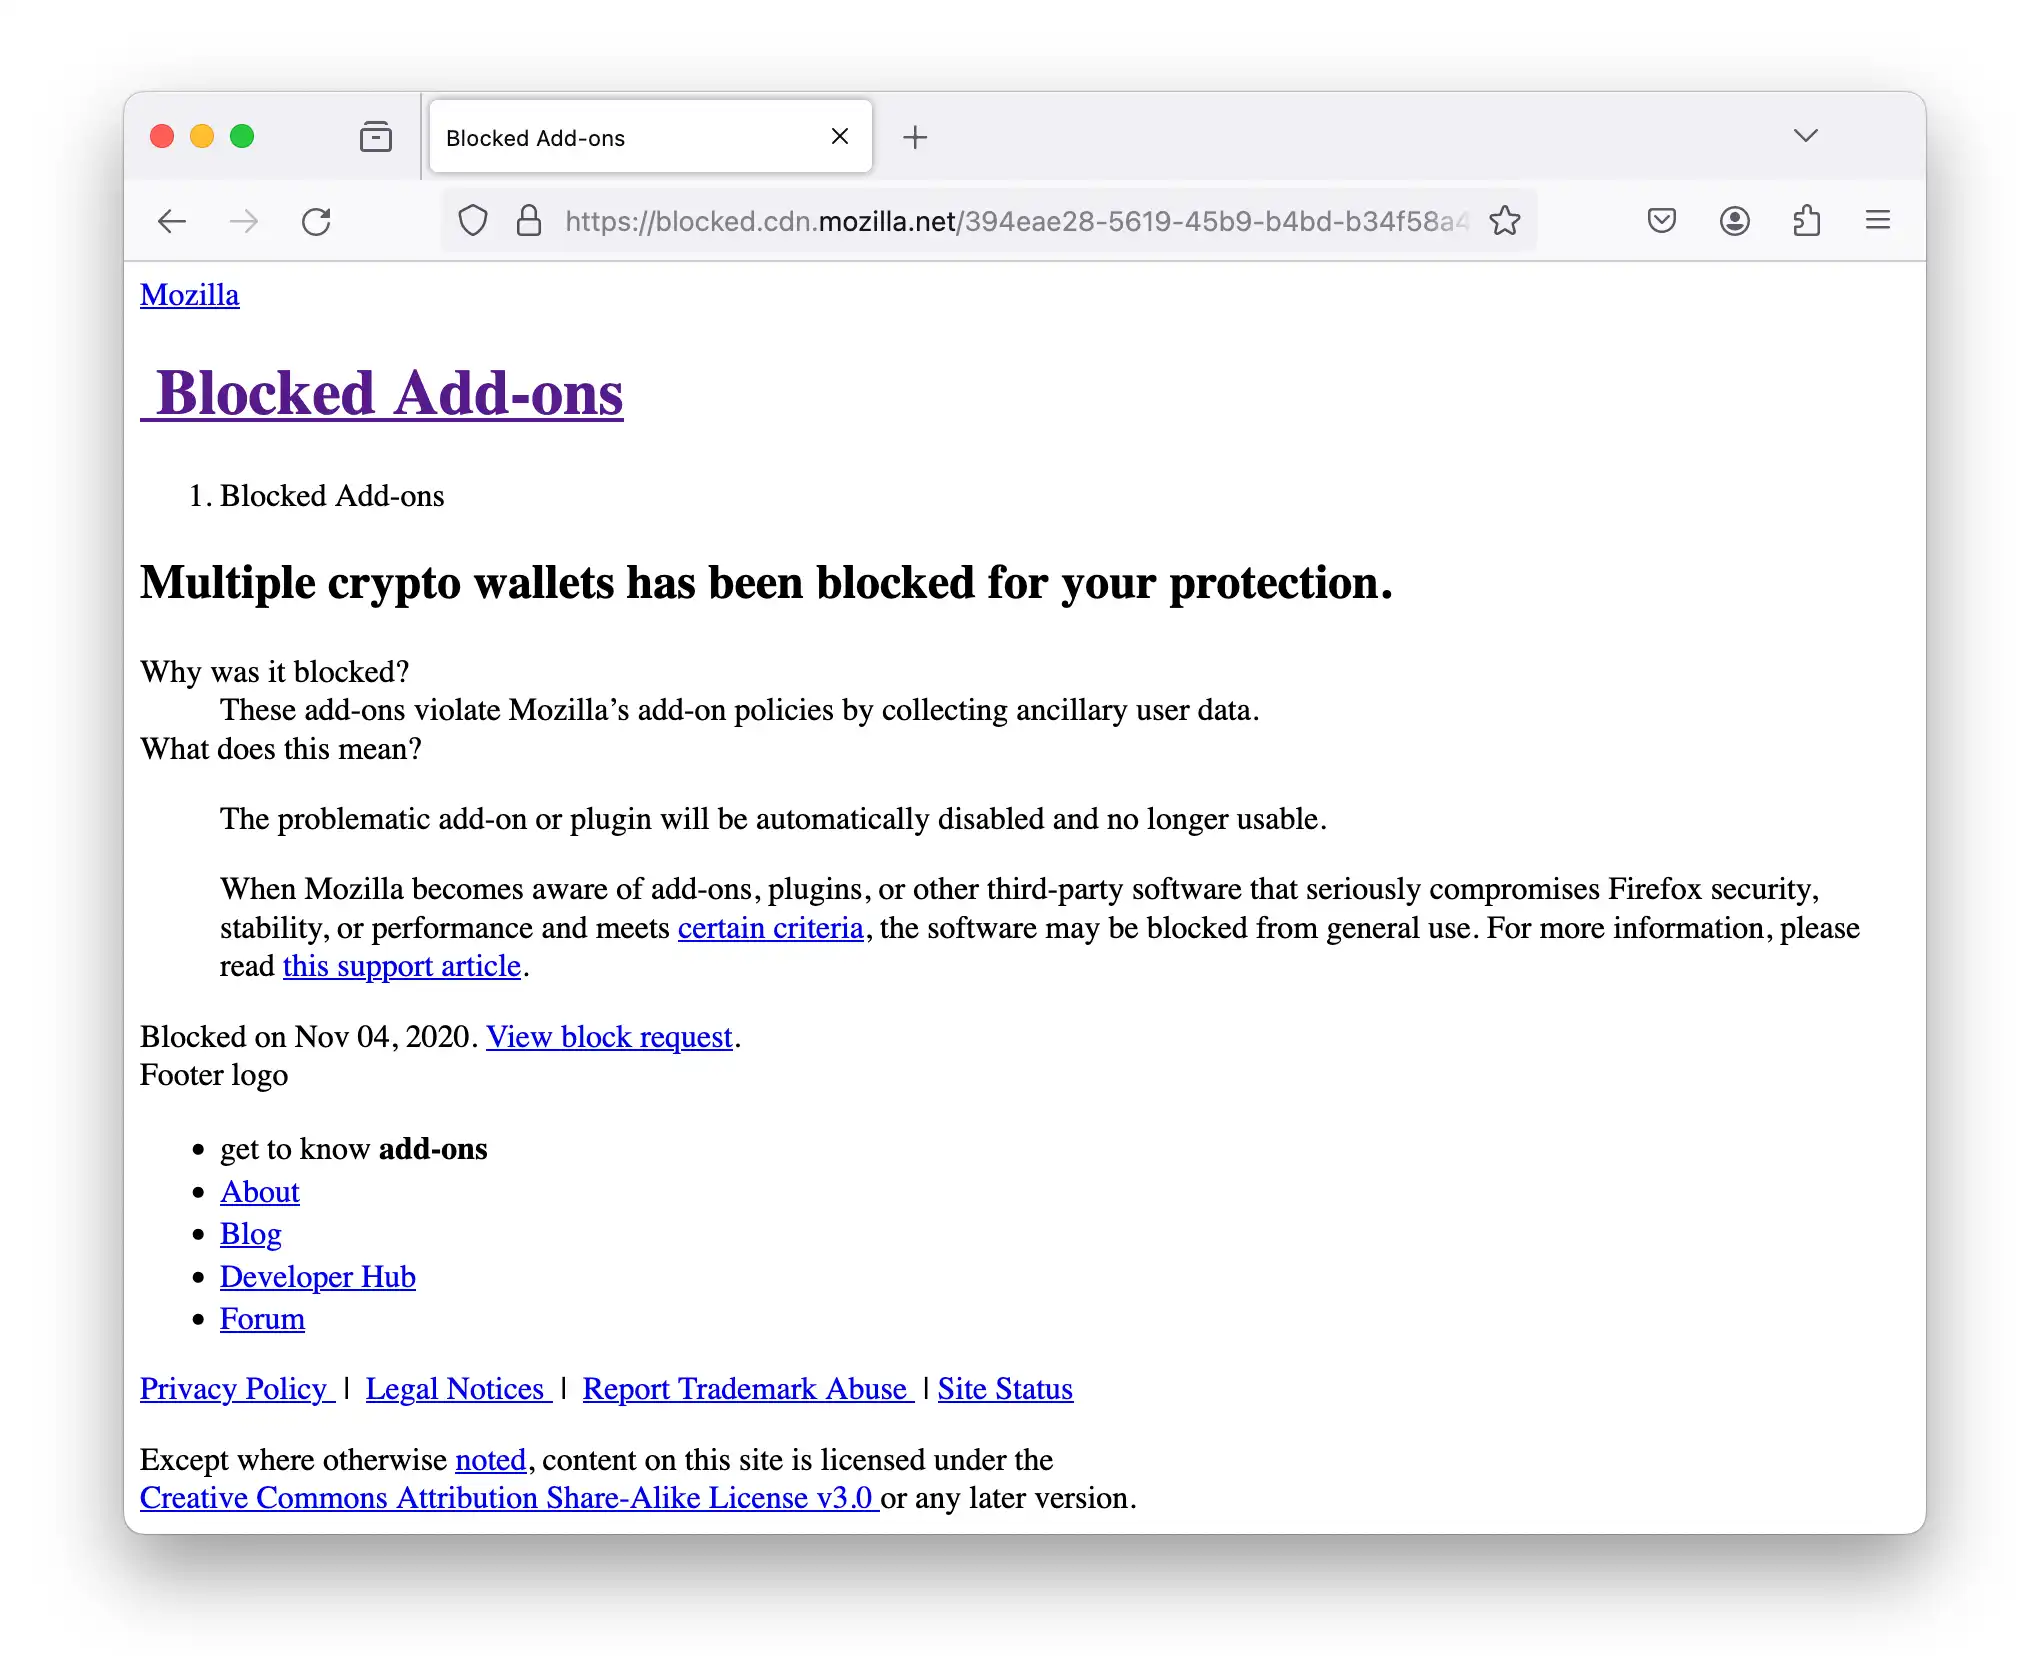
Mozilla periodically bans add-ons from the Firefox store that violate its terms of service.
This message is the result of a VPN add-on containing a known security vulnerability or malicious software.
We recommend you choose a safer FireFox VPN instead such as ExpressVPN or NordVPN.
VPN Add-On Won’t Connect Following Installation
There are several reasons why your VPN extension may not connect following start-up. Some VPN services, such as Surfshark, won’t function unless you’ve created an account and have an active subscription.
Other VPNs, like ExpressVPN, require you to have one of their VPN apps already installed on the device you’re using to access Firefox.
In these instances, we suggest you contact your VPN service provider for assistance.
How to Optimize Your Firefox Browser for Privacy
A VPN extension hides your IP address, but it can’t stop advertisers and other third-parties from monitoring your internet activity through tracking cookies and browser fingerprinting.
While Firefox is one of the most private browsers we’ve tested, it requires some configuration to optimize it for privacy.
We recommend you implement the following measures to maximize the privacy benefits of a VPN add-on:
1. Disable Telemetry in Your Firefox Settings

Once you’ve disabled Telemetry, Firefox will delete the data it’s collected about you within 30 days.
Most search engines use Telemetry to collect data about its users with the intention of optimizing performance and tailoring troubleshooting.
This is highly intrusive and can include sensitive information such as your real IP address, device model, and your browsing activity.
Unlike most browsers, Firefox gives you the option to limit Telemetry in its privacy settings.
Here’s how to disable Telemetry on Firefox:
- Access your privacy settings. Click the hamburger menu in the toolbar and select Settings > Privacy & Security.
- Disable Firefox’s data collection. Scroll down to Firefox Data Collection and Use and ensure every box is unticked.
2. Enable Enhanced Tracking Protection
Enhanced Tracking Protection may cause some websites to render incorrectly.
Firefox includes a proprietary tracker blocker for further protection. This prevents websites from attaching their own trackers to you while you browse.
Here’s how to enable Enhanced Tracking Protection on Firefox:
- Access your privacy settings. Click the hamburger menu in the toolbar and select Settings > Privacy & Security.
- Enable Enhanced Tracking Protection. Select Custom and tick each type of tracker you want to block.
You can select Manage Exceptions… if there are specific websites you want to avoid disrupting.
If you encounter any problems using this feature, you can disable content blocking for a specific site by clicking on the shield symbol to the left of the URL bar