Top10VPN is editorially independent. We may earn commissions if you buy a VPN via our links.
How to Set Up and Use a VPN
Simon Migliano
Simon Migliano is a recognized world expert in VPNs. He's tested hundreds of VPN services and his research has featured on the BBC, The New York Times and more. Read full bio
We’ll show you the easiest way to set up a VPN on every major device and platform: Windows, macOS, iOS, Android, Chrome, Firefox, Apple TV, Fire TV Stick, gaming consoles, and even your router. For each platform, we’ll cover the simplest method first, followed by any useful alternatives.
There’s a lot of contradictory information out there about how to set up a VPN. Some guides make it sound more complicated than it is.
Others gloss over the parts that actually matter, like why a browser extension and a desktop app aren’t the same thing, or what to do when your Apple TV is running an older version of tvOS.
We’ve written this setup guide specifically to clear the air for beginners. You don’t need any technical knowledge to follow the native app setup methods on most devices.
By following our instructions, you’ll be able to get your VPN up and running in under three minutes.
We’ll also cover more advanced methods (manual configuration, router setup, .apk sideloading) with clear step-by-step instructions for when you need them.
If you don’t want to read, watch our video tutorial below which covers the main setup method for all popular devices:
Why Trust Us?
We’re fully independent and have been reviewing VPNs since 2016. Our ratings are based on our own testing results and are unaffected by financial incentives. Learn who we are and how we test VPNs.
VPNs Tested
61
Total Hours of Testing
30,000+
Combined Years of Experience
50+
Summary: Main Setup Methods by Device
Use the table to find the right approach for your device, then jump to the dedicated section:
Still Not Sure Which Method to Use?
If you’re still unsure which approach to take, this checklist covers every scenario:
Does your device support native VPN apps (Windows, macOS, iOS, iPadOS Android, Apple TV tvOS 17+, Fire TV)? → Install the VPN app.
Do you only want to protect your web browser, not your whole device? → Use a Chrome or Firefox extension instead of the full app.
Do you have an Apple TV on older tvOS? → Use Smart DNS.
Do you want to use a VPN on your smart TV, game console, or other device that doesn’t support VPN apps? → Install the VPN on your router, or share your PC’s VPN connection. To unblock streaming content, Smart DNS is the easiest option.
Do you want every device in your home to use a VPN connection? → A router VPN is the right call, even if setup takes longer.
How to Set Up a VPN on Windows
There are two ways to install a VPN on Windows: a native app (right for almost everyone) or a manual connection using Windows’s built-in VPN client. We’ll cover both.
Method 1: Install a VPN App on Windows
Using NordVPN to Stream Geo-blocked NBA Games on PC.
This is the correct approach for 99% of Windows users. Every major VPN has a dedicated Windows app that handles everything automatically.
Choose a VPN service and subscribe. We’ve used ExpressVPN in this example, but the process is identical for NordVPN, Surfshark, and most other services.
Download the Windows app from your VPN provider’s website. Don’t use third-party download sites — always go directly to the VPN’s official site.
Run the installer (.exe file). Click through the setup wizard and accept the permissions requested. The VPN will need to install a network adapter — this is normal.
Open the VPN app and sign in with the email and password you used when subscribing.
Connect to a server. Hit the large Connect button or power icon. The app will automatically connect you to the fastest server. If you want a specific location, browse the server list first.
You’re connected. Look for a confirmation message or a green light in the app. Your traffic is now encrypted and your IP address has changed.
Some VPNs, like ExpressVPN and NordVPN, offer a system tray icon so the VPN is always one click away. We recommend enabling this for convenience.
Method 2: Manual VPN Setup on Windows (IKEv2)
Windows 10 and 11 have a built-in VPN client that lets you set up a manual connection, with no app required. However, it only supports the IKEv2 protocol, and you can’t easily switch server locations.
We only recommend this method if you can’t install a native app for some reason.
Open Windows Settings (Win + I) and go to Network & Internet > VPN.
Click ‘Add a VPN connection’.
Set ‘VPN provider’ to ‘Windows (built-in)’ and select IKEv2 as the connection type.
Enter your VPN’s server address in the Server name or address field. You’ll find this in your VPN account portal under manual setup / IKEv2 configuration.
Enter your VPN username and password. These are the manual-setup credentials from your account portal, not your standard login.
Click Save, then select the connection and click Connect.
To change location, repeat step (4).
As you may have guessed, this method creates a fixed connection to one server. To change location, you’ll need to create a new connection by entering a new VPN server address.
⚠️ Important
Make sure your VPN subscription supports IKEv2 manual configuration. Not all do. You’ll also need your VPN’s server address and login credentials for manual setup (found in your VPN’s online account).
Troubleshooting: VPN Not Working on Windows
Very occasionally something will go wrong. If after setup your VPN isn’t connecting, try the quick fixes below:
VPN installs but won’t connect: Try disabling your Windows firewall temporarily to see if it’s blocking the connection. If that fixes it, add the VPN app as a firewall exception.
Connection drops repeatedly: Enable the VPN’s kill switch feature if available. Also try switching VPN protocols — OpenVPN UDP is a good starting point.
‘TAP adapter’ error on install: Right-click the installer and select ‘Run as administrator’. Some VPN drivers need elevated permissions to install correctly.
Slow speeds after connecting: Try a different server location, preferably one geographically close to you. Also try switching from UDP to TCP or vice versa.
How to Set Up a VPN on Mac (macOS)
Like Windows, macOS gives you two options: a dedicated VPN app for Mac devices or a manual setup using macOS’s built-in network settings.
Method 1: Install a VPN App on macOS
Surfshark’s macOS app is full of free extra settings.
Sign up to a VPN from its website. Navigate to the download section and download the macOS app (.dmg file).
Open the .dmg file. Double-click it from your ‘Downloads’ folder.
Move the app to your ‘Applications’ folder. The installer will usually prompt you to drag the app icon to the ‘Applications’ shortcut.
Open the app from your ‘Applications’ folder. macOS may ask you to confirm you want to open an app downloaded from the internet — click ‘Open’.
Sign in with your VPN account credentials.
Click ‘Connect’. The app will prompt you to ‘Add VPN Configurations’ — click ‘Allow’. This is a standard macOS permission for VPN apps.
You’re connected. A VPN icon will appear in your macOS menu bar.
Some VPNs, like ExpressVPN, NordVPN, and Surfshark, are also available on the Mac App Store. The App Store version works identically, but often lacks some of the features present in the website version of the software.
Method 2: Manual VPN Setup on macOS
macOS supports IKEv2, L2TP/IPSec, and Cisco IPSec for manual connections. IKEv2 is the most secure of the three.
Open ‘System Settings’ (or ‘System Preferences’ on older macOS) and go to ‘Network’.
Click the + button to add a new network interface. Set ‘Interface’ to ‘VPN’ and ‘VPN Type’ to ‘IKEv2’.
Enter a name for your connection and click ‘Create’.
Enter your VPN’s server address and your Remote ID (usually the same as the server address — check your VPN service’s manual setup instructions).
Click ‘Authentication Settings’ and enter your username and password.
Click ‘OK’, then ‘Connect’.
Troubleshooting: VPN Not Working on macOS
macOS blocks the VPN app on first install: Go to System Settings > Privacy & Security and click ‘Allow Anyway’ next to the blocked app notification.
VPN connects but no traffic routes through it: Open Network settings, select the VPN connection, and check ‘Send all traffic over VPN connection’.
Slow speeds: Switch VPN protocols. The native macOS client is limited to IKEv2, but dedicated apps can use WireGuard or OpenVPN, which are often faster.
How to Set Up a VPN on iPhone and iPad
As with Windows and macOS, using a dedicated VPN for iPhone and iPad is by far the most straightforward method.
Method 1: Install a VPN App from the App Store
ExpressVPN’s iPhone app is one of the easiest to use.
Open the App Store and search for your VPN service by name (e.g., ‘ExpressVPN’ or ‘NordVPN’).
Tap ‘Get’ to download and install the app.
Open the app and sign in.
Tap ‘Allow’ when the app asks to Add VPN Configurations. This is an iOS security prompt — it’s normal and necessary.
Tap ‘Connect’. You’ll see a VPN icon in the iOS status bar when connected.
On iOS and iPadOS, the VPN app controls everything from within the app itself. You can also find the VPN listed under ‘Settings > General > VPN & Device Management’ if you want to connect or disconnect without opening the app.
Method 2: Manual VPN Setup on iOS (IKEv2)
Go to Settings > General > VPN & Device Management > VPN.
Tap ‘Add VPN Configuration’.
Select ‘IKEv2’ as the type.
Enter your VPN’s server address, Remote ID (usually the same as the server address), and your username and password.
Tap ‘Done’, then toggle the VPN on.
Troubleshooting: VPN Not Working on iPhone or iPad
VPN disconnects when the screen locks: Go to Settings > General > VPN & Device Management > VPN, tap the (i) next to your VPN, and make sure ‘Connect On Demand’ is enabled if available.
App won’t connect on a specific WiFi network: Some networks — especially corporate or hotel WiFi — block VPN connections. Try switching to mobile data to confirm.
Can’t find the VPN in the App Store: Some VPNs have been removed from the App Store in certain countries (especially China and Russia). Contact your VPN service for alternative installation methods.
How to Set Up a VPN on Android
Just like on iOS and iPadOS, the best VPNs for Android have developed custom software for Android mobiles and tablets. The process to set them up is therefore almost identical to iPhone or iPad.
Method 1: Install from the Google Play Store
Hide.me’s free server locations on Android.
Check that your chosen VPN has a native Android app (all reputable VPNs do).
Subscribe to the VPN and create an account on the VPN service’s website.
Search for the VPN app in the Google Play Store and install it.
Open the app and sign in with the credentials you created.
Follow any setup prompts. Some VPNs will ask to share anonymous diagnostic data — your choice, but it isn’t required.
Tap the ‘Connect’ button (usually a large power button in the center of the screen). Android will ask you to approve the VPN connection — tap ‘OK’.
Method 2: Sideload an .apk File
If you’re in a country where the Google Play Store is unavailable, or your VPN isn’t listed there, you can install the VPN app by sideloading an .apk file directly.
On your Android device, go to Settings > Apps > Special App Access > Install Unknown Apps.
Allow your browser to install apps from unknown sources.
Visit your VPN provider’s website on your Android device and download the .apk file.
Open the downloaded file. Android will prompt you to install it — tap Install.
Open the app and sign in.
⚠️ Important
Only download .apk files from your VPN provider’s official website. Never use third-party .apk repositories — they may distribute modified, potentially malicious versions of apps.
Method 3: Manual Setup via OpenVPN Connect
If your VPN doesn’t have a native Android app, you can often use a third-party app called OpenVPN Connect (free on the Play Store) with configuration files from your VPN service.
Download OpenVPN Connect from the Play Store.
Log in to your VPN provider’s website and download the OpenVPN configuration files (.ovpn files) for the server locations you want.
Open OpenVPN Connect, tap the + button, and import the .ovpn file.
Enter your VPN username and password when prompted.
Tap Connect.
Troubleshooting: VPN Not Working on Android
Play Store shows ‘Not available in your country’: Download the APK directly from the VPN provider’s website instead.
VPN keeps disconnecting on Android: Go to Settings > Battery and ensure the VPN app is excluded from battery optimization. Android aggressively kills background apps to save battery, which can interrupt VPN connections.
DNS leaks on Android: Enable the VPN’s built-in leak protection or, in Android’s settings, set a Private DNS address to your VPN provider’s DNS servers.
How to Add a VPN Extension to Chrome
A Chrome VPN extension is the quickest way to protect your browser traffic. You don’t need to install full VPN software.
That said, it’s important to understand what a browser extension does (and doesn’t) protect.
⚠️ Important
A VPN browser extension only encrypts traffic within Chrome itself. Apps, games, and other programs running outside your browser aren’t protected. For full-device protection, use a dedicated VPN app instead.
Method 1: Install via the Chrome Web Store
Using ExpressVPN’s Chrome extension to unblock Disney+.
Open Chrome and go to the Chrome Web Store (chromewebstore.google.com).
Search for your chosen VPN by name. Stick to VPNs you’ve already subscribed to, or well-known services with verified publisher badges.
Click ‘Add to Chrome’, then confirm by clicking ‘Add Extension’.
Once installed, click the extension icon in your Chrome toolbar (top-right). If you can’t see it, click the puzzle-piece icon and pin your VPN.
Sign in with your VPN account credentials.
Optimize your privacy settings. Look for options to Block WebRTC leaks and Spoof your location — enable both. Without these, websites can still detect your real IP address even with the extension active.
Select a server location and click ‘Connect’. The extension icon should change color (usually to green) when connected.
ExpressVPN’s Chrome extension is an exception: it requires the ExpressVPN desktop app to be running at the same time. It essentially acts as a remote control for the desktop app rather than a standalone extension.
Important Settings to Enable in Your Chrome VPN Extension
Block WebRTC: WebRTC is a browser technology that can expose your real IP address even while connected to a VPN. Enable this setting in your extension’s privacy options.
Spoof your location: This prevents websites from using your browser’s geolocation API to determine your physical location.
HTTPS everywhere (if available): Forces encrypted HTTPS connections where possible.
In Chrome, block websites from seeing your location by going to: Privacy and security > Permissions > Location and then selecting ‘Don’t allow sites to see your location’.
Troubleshooting: Chrome VPN Extension Not Working
Extension can’t connect: Check if you’ve exceeded your VPN’s simultaneous connection limit. Disconnect the VPN on another device and try again. If your VPN supports unlimited connections (like Surfshark), this won’t be an issue.
Version incompatibility error: Update Chrome by going to the three-dot menu > Help > About Google Chrome. Then try reinstalling the extension.
Extension is grayed out or disabled: Another extension may be conflicting. Try disabling other extensions one by one to identify the culprit.
My VPN’s extension blocks other extensions: This is a known issue with some VPN extensions. If you notice this, try disabling and re-enabling the VPN extension, or use the desktop app instead.
How to Add a VPN Extension to Firefox
Firefox VPN extensions work very similarly to Chrome extensions, with a few differences worth knowing about.
The VPN add-on ecosystem on Firefox is slightly smaller, but all major VPN services are available.
Method 1: Install via Firefox Browser Add-Ons
CyberGhost’s Firefox extension.
Open Firefox and click the hamburger menu (≡) in the top-right corner.
Click ‘Add-ons and Themes’, then browse or search for your VPN provider.
Alternatively, go directly to addons.mozilla.org and search there.
Click ‘Add to Firefox’ on the extension listing page.
Click ‘Add’ when Firefox asks for permissions.
Click the VPN icon that appears in your Firefox toolbar and sign in.
Enable WebRTC blocking and location spoofing in your VPN extension’s settings.
Click ‘Connect’.
Method 2: Manual Proxy Configuration in Firefox
Firefox lets you configure a manual proxy connection, which can be used with a SOCKS5 proxy from your VPN provider. This is a niche method, and there’s a significant catch.
Due to a Firefox authentication bug, paid SOCKS5 proxies don’t authenticate correctly in Firefox. Manual proxy configuration in Firefox only works reliably with free (and unencrypted) proxies.
If online privacy matters to you, use the VPN browser extension or the desktop app instead.
Go to Firefox Settings: Hamburger menu > Settings).
Scroll to ‘Network Settings’ at the bottom of the General tab and click ‘Settings’.
Select ‘Manual proxy configuration’.
Enter your proxy’s IP address and port number. For SOCKS5, use port 1080 unless your provider specifies otherwise.
Tick ‘Also use this proxy for HTTPS’ and click ‘OK’.
Troubleshooting: Firefox VPN Extension Not Working
‘This add-on is not compatible with your version of Firefox’: Click ‘See all versions’ on the extension listing to find a compatible release, or update Firefox via Help > About Mozilla Firefox.
Extension installs but the VPN won’t connect: Ensure you’re signed into the correct account. Also check whether the full desktop app is required — some VPN extensions (like ExpressVPN’s) need it running simultaneously.
Extension stops working after a Firefox update: Wait for the VPN provider to push an updated extension, or switch to using the desktop VPN app until then.
How to Set Up a VPN on Apple TV
This used to be one of the most frustrating VPN setups, requiring workarounds like Smart DNS or router configuration. That changed in September 2023 when Apple added native VPN app support in tvOS 17.
If your Apple TV is running tvOS 17 or later, the setup is now as simple as any other device. If not, you’ve got a couple of decent alternatives.
Check your tvOS version by going to: Settings > System > Software Updates. If there’s an update available, install it first.
Open the App Store on your Apple TV.
Use Siri or the on-screen keyboard to search for your VPN.
Click ‘Get’ to download and install the app.
Sign in to your account. Since many VPN apps now support QR code login, open your VPN app on your iPhone, find the QR code login option, and hold it in front of your Apple TV camera. This saves you typing out your credentials with the remote.
Click ‘Allow’ when prompted to ‘Add VPN Configurations’.
Select a server location and tap ‘Connect’.
Method 2: Smart DNS
Setting up ExpressVPN’s MediaStreamer (Smart DNS proxy).
This is the best option if your Apple TV is running on an older tvOS version (below 17), or if your VPN doesn’t have a dedicated tvOS app.
Smart DNS works differently to a VPN. Instead of encrypting your traffic and routing it through a VPN server, it simply changes your DNS settings to trick streaming services into thinking you’re in a different location.
Smart DNS is typically faster than a VPN for streaming, but it offers no privacy protection.
Some VPN subscriptions include a Smart DNS proxy, but check before subscribing since not all VPNs offer it. ExpressVPN, NordVPN, Surfshark, and CyberGhost all come with good Smart DNS features.
Log in to your VPN account on the web and find the Smart DNS settings. Note the DNS server addresses provided.
Register your IP address in your VPN service’s Smart DNS account area.
On your Apple TV, go to: Settings > Network > Wi-Fi (or Ethernet).
Select your current network and click ‘Configure DNS’.
Switch from ‘Automatic’ to ‘Manual’, and enter the Smart DNS server addresses.
Restart your Apple TV to apply the changes.
Some guides incorrectly recommend using AirPlay and your VPN together. Most of the time this doesn’t work (although we have seen a few exceptions).
That’s because your Apple TV and casting device must be on the same network in order for AirPlay to work. When you connect to a VPN, your network changes.
To use AirPlay with your VPN smoothly, you’ll have to install the VPN at the router level.
Troubleshooting: VPN Not Working on Apple TV
VPN app isn’t available in the App Store: Not all VPNs have tvOS apps yet. Use the Smart DNS method instead, or switch to a VPN that does have a tvOS app.
Streaming service still shows content from my home country: Disconnect and reconnect the VPN, then force-quit and reopen the streaming app. Some apps cache your location.
Smart DNS isn’t unblocking anything: You may need to whitelist your IP address in your VPN account’s Smart DNS settings. Check your VPN provider’s documentation.
How to Set Up a VPN on Fire TV Stick
Amazon’s Fire TV Stick is one of the most VPN-friendly streaming devices out there, and the majority of popular VPNs have a custom Fire TV app available directly from the Amazon appstore.
Which Fire TV Setup Method Is Right for You?
Method 1: Install from the Amazon Appstore
The IPVanish homescreen on Amazon Fire TV Stick.
Subscribe to a VPN via the website or its mobile app.
On your Fire TV Stick home screen, select the Search icon (magnifying glass) or use the Alexa voice button.
Type or say the name of your VPN service.
Select the VPN app from the search results and click Get or Download.
Once installed, open the app and sign in.
Pick a server location and click ‘Connect’.
The Fire TV Stick 4K Select uses Amazon’s own operating system, Vega OS. If you have these Fire TV devices, then you’ll have to use a compatible VPN like IPVanish or NordVPN.
If a VPN app doesn’t appear in Amazon Appstore search, it may not be available in your region’s Appstore, or in any for that matter. In that case, use the .apk sideloading method below.
Method 2: Sideload an .apk File
Some VPN services don’t have a listing in the Amazon Appstore but do provide an Android .apk file you can sideload. Most Fire TV Stick models still run on a version of Android (Fire OS).
Enable apps from unknown sources: Go to Settings > My Fire TV > Developer Options. Turn on Apps from Unknown Sources.
Install the Downloader app: Search for ‘Downloader’ in the Appstore and install it — it’s free and makes downloading APK files much easier.
Open Downloader and enter the URL of the .apk file from your VPN service’s website. You’ll usually find this in the ‘Download for Android’ or ‘Fire TV’ section of the VPN’s website.
Download and install the .apk file. When prompted, click ‘Install’.
Open the VPN app and sign in.
Importantly, only sideload .apk files from your VPN provider’s official website. Third-party .apk download websites can distribute modified, malicious versions of apps.
Also, VegaOS doesn’t allow sideloading (yet).
Troubleshooting: VPN Not Working on Fire TV Stick
VPN app freezes or crashes on Fire TV: Clear the app’s cache (Settings > Applications > Manage Installed Applications > [VPN app] > Clear Cache) and try again.
Streaming app still shows home country content: Force-stop the streaming app, clear its cache, and reopen it after connecting to the VPN.
Sideloading fails: Make sure ‘Developer Options’ and ‘Apps from Unknown Sources’ are enabled. Also ensure the .apk file is for ARM architecture (Fire TV uses ARM processors).
How to Set Up a VPN on Your Router
Installing a VPN on your router is the single most powerful setup method. Once it’s done, every device on your WiFi network is automatically protected: smart TVs, game consoles, and anything else that can’t run a VPN app natively.
The trade-off is complexity. Router VPN setup is significantly harder than installing an app, and it’s easy to make mistakes.
That said, there are now simpler options than there used to be.
What You’ll Need Before You Start
A compatible router. Popular brands with VPN support include ASUS, Linksys, and Netgear. Not all routers support VPN firmware, so check your router model first.
A VPN subscription. ExpressVPN is the best choice for routers thanks to its dedicated router app. Most other VPNs require manual OpenVPN or WireGuard configuration.
We summarized three different methods below, but to make things as easy as possible for you, we’ve also created a detailed VPN router setup guide.
Method 1: Dedicated Router App (Easiest with ExpressVPN)
ExpressVPN has a custom VPN app for routers that installs like any other software, and gives you a browser-based UI for switching locations and managing connections across any device on your WiFi network.
Setup takes around 10 minutes and requires no technical knowledge.
Sign up to ExpressVPN.
In your ExpressVPN account, navigate to: Set Up on More Devices > Router.
Once installed, access the router app via your browser at the provided local address.
Sign in and select a server location on your device(s).
With ExpressVPN, you can choose whether to protect your entire home network, or which devices should use different VPN IP locations.
Method 2: Buy a Pre-Configured (Pre-flashed) VPN Router
Pre-flashed VPN routers come with VPN firmware already installed. You just plug them in, enter your VPN credentials, and connect.
They start at around $130.00 (without a VPN subscription) which is expensive but genuinely beginner-friendly.
The most popular vendor of pre-configured VPN routers is FlashRouters, which supports most major VPN services.
ExpressVPN has also developed its own router called AirCove, which is easy to use and even comes in a travel-friendly size.
How to Set Up a VPN on Smart TVs, Roku & Game Consoles
Most smart TVs (Samsung, LG, etc.) don’t natively support VPN apps. You simply can’t install a VPN directly on them the way you can on a phone or computer.
We’ve made a video explaining the different options available to use your VPN on your LG TV, Samsung TV, or any other TV that lacks access to the Google Play Store.
Below are the three most practical options to use a VPN on your Smart TV or gaming system:
Method 1: Install the VPN on Your Router
This is the cleanest long-term solution. Once your router has a VPN running on it, every device on your home network is protected. Jump to the router section above for more details.
Method 2: Share Your Computer’s VPN Connection
If you don’t want to install a VPN on your router, you can connect your smart TV or console to the internet through your computer, which is already running the VPN.
On Windows: Set up a mobile hotspot in Settings > Network & Internet > Mobile Hotspot, with your VPN active. Connect your TV or console to this hotspot.
On macOS: Use Internet Sharing (System Settings > General > Sharing) to share your VPN-protected Mac connection over Wi-Fi. Connect your TV or console to this network.
Android TVs are an exception, since many VPNs have Android TV apps that you can install directly from the Google Play Store. Check your VPN service’s website to confirm it offers Android TV support.
Method 3: Use Smart DNS
A third option is to use a Smart DNS proxy on your device, which changes your DNS settings to spoof your location. We’ve explained how to do this in the Apple TV section further up.
Finally, there is a really old method that still works well because of its simplicity: using a good old HDMI cable! It’s worth considering if you don’t want to spend too much getting your PC’s or Mac’s stream on the big screen.
How to Set Up Your VPN for Privacy & Security
Once you’ve installed a VPN on your device, it’s recommended to change the app’s settings for optimal privacy, security, and performance.
The best VPNs have these settings enabled by default, but it’s always worth checking them.
Check your VPN is set to automatically start. If possible, it’s best to run your VPN when your device starts to ensure your web traffic is always protected.
Check your kill switch is enabled. A VPN kill switch stops your real IP address leaking if the VPN connection unexpectedly drops. You can use our VPN kill switch test to check if yours is working properly.
Check you’re using OpenVPN, WireGuard or equally secure protocol. OpenVPN and WireGuard are the two fastest and most secure VPN protocols available. You can also use NordVPN’s NordLynx and ExpressVPN’s Lightway as safe alternatives.
Check your encryption. If your VPN allows you to customize your encryption cipher, select AES-256-GCM or ChaCha20-Poly1305 for optimal security.
Check leak protection is enabled. Once you’ve enabled any leak protection settings, run a VPN leak test to confirm your real IP address and other identifying information isn’t leaking through the VPN.
How to Choose the Right VPN Server
The server location you connect to determines your virtual IP address and geo-location as well as affecting your connection speeds and latency.
We’ve created a flowchart breaking down which VPN server you should choose depending on your needs:
If you’ll be using a VPN to enhance your online privacy and security, you should install it on all the devices you use to browse the internet. Setting up a VPN on your router is a great way to protect all devices on your network.
If you’re using a VPN to unblock geo-restricted streaming content, you may just want to set it up on the device(s) you’ll be using to access that content.
Keep in mind your VPN provider’s simultaneous connections policy when using the service on multiple devices.
Do I Have to Set Up My VPN Manually?
Most of the time, the easiest way to set up a VPN is to install a dedicated VPN app, which doesn’t require manual configuration.
On devices that can’t run VPN apps directly – like game consoles and some smart TVs – you’ll have to use alternative methods to use your VPN on them (as we explained in this guide).
You’ll also need to set up your VPN manually if you don’t have permission to install software on your device.
What Is a VPN Kill Switch & Do I Need It?
A kill switch automatically cuts your internet connection if the VPN drops unexpectedly, preventing your real IP address from being exposed. It’s a useful safety net that we always recommend enabling.
What's the Safest VPN Protocol to Use?
WireGuard and OpenVPN are both excellent choices. WireGuard is faster; OpenVPN has a longer track record.
How Do I Know If My VPN Is Actually Working?
After connecting to a VPN server, go to our What Is My IP tool and check the IP address and location shown. It should match your VPN server’s location, not your real location.
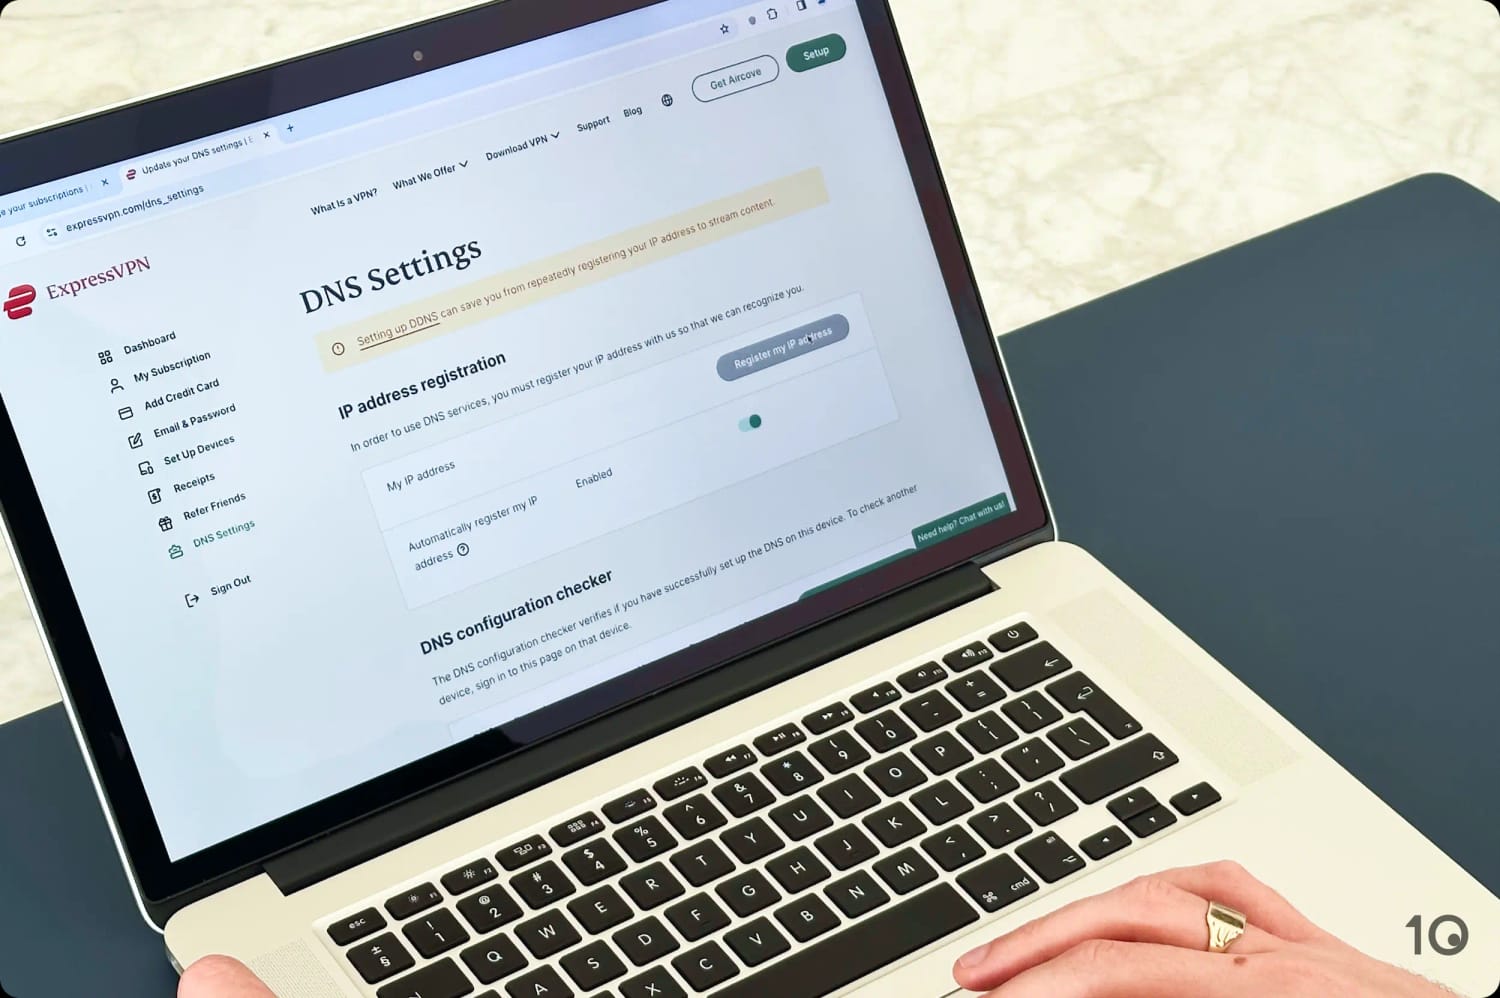
You can also run a DNS leak test to confirm your DNS requests are being routed through the VPN.